Pressure Transmitter Wiring Guide: 4-20mA Loop Connections
Pressure transmitter wiring for a 4-20mA loop may seem a bit of an uphill task at first, but once you have a robust foundation of the basics, you will find it a simple process. This guide seeks to clarify what wiring entails and the step-by-step method for doing it yourself, in the simplest way possible. This blog will adequately prepare you to transmit signals from a control system to a receiver, or vice versa, whether you have been doing this for years or are only just starting to wrangle with control instruments. From topic-related materials to the confusion level anticipated while performing the activity, we are all out to help with everything that needs doing. Here’s how to make installing and improving the 4-20mA loop wiring easier!
Introduction to Pressure Transmitters

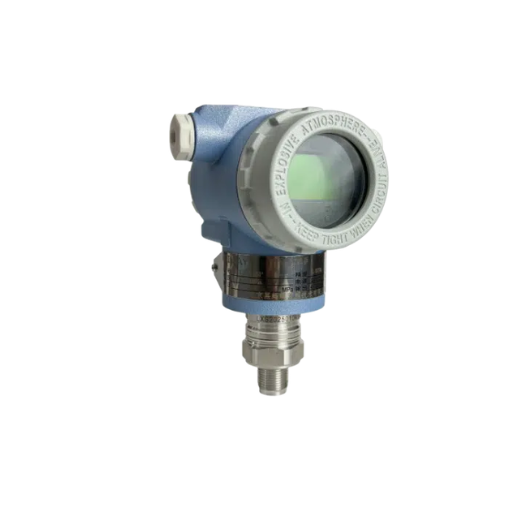
A pressure transmitter is an instrument that measures pressure in gases or liquids and converts it into an electrical signal. In many industries, it is used to monitor and control processes within a specific environment. The base component of a pressure transmitter is often a pressure sensor, to which a pressure connector is mounted, and the electronic circuits into which the sensor mounts protrude convert the signal from the sensor into a standardized signal, such as 4-20mA, which can then be further used. These instruments ensure the correctness of the system in question and, as a result, are widely used in the petrochemical, processing, and potable water industries.
What is a Pressure Transmitter?
An electrical device called a pressure transmitter is used to detect the pressure of gases, liquids, or steam and to convert the measured data into an electric signal for assessing and managing requirements across industries worldwide.
Understanding the 4-20mA Current Loop
The conventional 4-20mA current loop is very popular within the industry as a standard to send analog signals. It provides a strong process which can send information without any painstaking loss so perfectly suitable for long distance communications. The scope of utilization of the current loop actually fluctuates between 4mA and 20mA, where 4mA conventionally stands for the zero value (or measurement of zero), whereas 20mA strength value is denoted.
Noise-free feature that distinguishes the 4-20mA current loop among industrial ones is the reason many users prefer this technology. As opposed to voltage signals where lead resistance accumulates with wire distances, these transmission types maintain data integrity over long communication paths. At the same time, within the framework of such transmission communication, the lowest current level (4mA) indicates no measurements and anything less than that signifies indicating a broken wire or an equipment problem.
Salient Features of 4-20 mA Current Loop
- 1Precision: It enables extremely precise data transmission with the least possible distortion.
- 2Noise Resistance: The current loop’s susceptibility to electrical disturbances is significantly reduced compared to voltage signals.
- 3Fault Detection: There is a baseline 4mA that facilitates identification of a zero level of signal, as opposed to a broken system.
Example of 4-20mA Signal Decoding
Example: There is a pressure transmitter which could be calibrated such that when the output current is 4mA, it signifies the pressure is 0 bar, whereas at 20mA, it is 10 bar. When the device is delivering 12 mA, the calculated pressure is about 5 bar (in the middle of the range).
Application Observations
Based on recent trends in the industry:
The 4 to 20mA current loop is still ubiquitously used in oil and gas, chemical industry, and even water facilities by virtue of its simplicity and ruggedness.
Studies suggest that 4-20mA instrumentation reduces maintenance costs of over 20% when compared to previous systems due to its dependability and minimal wiring needed.
Extensively adopted by the industry, this standard remains the foundation of industrial automation. It facilitates various processes and provides ease of use and robustness.
Applications of Pressure Transmitters in Industry
Industrial processes rely on pressure transmitters as integral devices to measure pressure accurately and dependably, primarily for safeguarding, optimizing, and regulating various processes. The following are guidelines for a list of recommended ways to apply pressure transmitters in various settings.
Oil and Gas Sector
These activities fall within either the upstream or the midstream, or downstream sector of the oil industry. Wellheads the pipeline flow pressures and reservoir levels are a few among other pressures monitored using transmitters. Maintaining safety and effectiveness in these hazardous settings would have been difficult without proper pressure monitoring which enhances leakage control.
Chemical Plants
Pressure transmitters allow for effective manipulation of reactants within the plants thereby enhancing safety and the use of materials. For instance, overpressure scenarios are controlled through monitoring the pressure within the reaction tank which otherwise would have resulted in expensive downtime.
Water and Wastewater Management
By integrating such tools, we affix the pressure within pipes, tanks, and water distribution networks thus assuring a continuous supply of water and a smooth operation of the systems. The devices are critical to leakages monitoring and detecting changes in the water levels in water storage tanks.
Power Generation
Such pressure transmitters allow to monitor the steam pressure in turbines and boilers in a power station. Correct pressure enhances energy utilization and protects the plant from possible damages that may arise as a result of excessive pressure.
Food and Beverages
Another sensitive industry is the production of food, which has to be preserved in an acceptable condition. Proper pressure transmitter wiring is important to ensure that the pressure in the tanks, pipelines, pasteurizers or any area where pressure is involved, is maintained within permissible limits of statutory laws and desired product output.
They show the breadth of importance that pressure sensors have in various installations for ensuring safe, productive, and smooth industrial processes.
Importance of 4-20mA Loop Connections

One of the most robust and extensively used methods of signal transmission in industrial applications is the 4-20mA current loop. This is because there is a guarantee of reliable, lossless data transmission between measuring devices and control units over any given working distance. The following is a detailed explanation of why 4-20mA loops are indispensable in every process plant:
Ability to Tolerate Electrical Noise in the Environment
In addition to their high sensitivity to voltage noise and susceptibility to interference, 4-20mA signals are very immune to electrical noise which is highly desirable in factories and many industrial settings where noise or electromagnetic interference (EMI) may influence other means of transmission.
Signal Quality over Large Distances
For example, when it is current in the form of 4-20mA that is used to transmit signals in a loop, unlike voltage-based systems, no signal degradation, however far the signal has to travel. This is the key advantage of the 4–20 mA current loop, and one of the reasons for its extensive usage in place of all other signaling methods, especially for long-range or any small or big gear that is heavily wired.
Safety Mode Operation
Another proponent of the well-known range of four to twenty milliamps is due to the minimum current being four milliamps. Anything below such a current level would mean a breakdown in the signal flow and would be seen as a problem, such as a bad pressure transmitter wiring or lack of power, and thus, troubleshooting is made possible.
Integration of Power and Signal in a Single Loop
With the 4-20mA loop, both power and signal can flow through a singular pair of cables. This feature translates to easier wiring and cheaper installation in environments with, say, several sensors or transmitters.
Uniformity and Ease of Use
The 4-20mA standard finds common application in many industries, thereby ensuring that diverse devices, systems, and their respective manufacturers can communicate effectively with each other. This aspect facilitates designing flexible systems that can be scaled.
These characteristics help explain pressure transmitter wiring and alternatives to new wireless solutions that have always been a vital infrastructure component.
Benefits of Using 4-20mA for Signal Transmission
Resisting Long-Distance Signal Loss
In practical industrial applications, it is unlikely that The 4-20mA current loop will be affected by either the electrical noise or attenuation of signals over large distances. This is because, unlike voltage, the current is capable of withstanding factors such as the presence of electromagnetic fields within the industrial environment, which makes wiring with such signals very appropriate.
Looking for Sources of Error Simplified
Another key feature of the 4-20mA design is the capacity to check the wiring for errors. A current reading below 4 mA, for instance, often suggests a disconnected cable or a circuit defect, whereas one above 20 mA might suggest an excessive load or interference. This aspect facilitates more efficient problem identification.
Power Saving
There is no requirement for additional external power sources to power the sensors or other equipment, as the current loop itself can provide it. This reduces power consumption significantly and simplifies the system design, resulting in cost savings.
Extensive Device Support Range
Most of the measuring devices, such as level transmitters, temperature transmitters, and pressure transmitters, as well as others, use the 4-20 mA current loop for communication with recording, storing, or indicating equipment; hence, the pressure transmitter wiring can be integrated with other devices using the same interface.
In addition, the 4-20mA standard ensures universal compatibility and integration into multiple devices such as programmable logic controllers (PLCs), distributed control systems (DCS) and other monitoring equipment. This allows for the convergence of many systems and promotes the growth of the system in a manner that is efficient.
Precision in the Signal Transmission Process
Current signals are also more stable in respect to the change of resistance in the wire, length of the wire or temperature. This translates to exact and consistent transmission of the signals, which is significant in industries where control and monitoring have to be done very carefully.
How 4-20mA Current Loop Works
The 4-20mA current loop is one of the many existing standard methods for analog signal transmission at longer distances in industrial control and automation systems. It is based on the concept of producing and sending a current that corresponds to a certain process variable, such as temperature, pressure, flow, and so on. The main parts of the 4-20mA current loop system consist of a transmitter, a source of energy, a receiver/controller device and cabling.
Functionality of the Transmitter
The purpose of the transmitter is to serve as the origin of the current loop signal. It is a device that performs the conversion of a measured physical quantity (such as temperature or pressure) to a current between 4mA and 20mA. For instance, in the case where the process variable is 50% of the full scale, the current output of the transmitter shall equal 12mA, midway between the minimum (4mA) and maximum (20mA).
Transmission of Current Loop Signal
A 4-20mA output that needs to be continuously processed is performed in a two-wire or four-wire configuration. When operating in two-wire mode, the transmitter provides power and signals over the same two wires. This reduces installation needs and prices. The current in the loop is the same throughout its length, which maintains signal integrity over long distances, since attenuation is less severe than with voltage signals.
Immunity to Noise
Thanks to many features of 4-20mA, there is no internal noise, and this is one of the biggest benefits 4-20mA brings. Unlike voltage signals, which are easily corrupted by electromagnetic noise or other physical conditions, current signals are less susceptible to such interference. This is because the transmission of the signal is quite robust in an electrical noise-filled industrial premises.
Measurement Theory and Data Analysis
When we see a 4mA reading, it is known as a ‘live zero’ and represents the lower bound of the process parameter. A live zero maintains its practical function, enabling the measurement to occur within the intended range, whilst any changes that have been implemented do not affect the measurement of the process parameter. Calibrations are always conducted within narrow limits, variance is automatically superseded because it is in line with the limits of the interests. For remote-control devices, this means the remote host is operating within its own limits. In this way, the system is protected from over- or under-saturation.
Resistance and System Voltage
In most cases, the resistance range (RL) operating the 4-20mA current loop is within 0 to 500Ω. It is essential to calculate the total load resistance when determining the voltage required from a power supply, and Ohm’s Law is used for that. For example, in a 250Ω loop with a maximum current of 20mA, the supply voltage must be greater than 5V (0.02A × 250Ω = 5V) for normal operation.
Inclusion in Contemporary Infrastructure
Many industrial systems make use of 4-20mA loops in addition to other protocols that integrate well, such as the HART (Highway Addressable Remote Transducer) protocol. This is because HART uses an additional frequency signal on the current loop, allowing instruments to send diagnostic and configuration data digitally without disturbing the analog loop.
The 4-20mA has been the most sought-after method of process control, and for a good reason: this current loop is very robust, precise, and dependable. This is true for many types of industry, such as manufacturing, oil & gas, and chemical processing.
Components of a 4-20mA Loop System
A 4-20mA current loop is an analog signal transmission system, and it is mostly made up of four components that are critical for the functioning and accuracy of the information that will be transferred.
Supply of Energy
A certain energy supply is responsible for providing energy for all the components of the system. In most cases, these power supplies are made for 24V DC, but it may depend on the specific system being used. As such, for all these devices to work on the current loop, the voltage is steady and maintained by the power source.
Sensor/Transmitter
This is a device that changes a physical parameter, such as temperature, pressure, flow, and much more, into an electronic signal. The latter is then presented as a current flow for at least 4mA but not higher than 20mA, while the current of 4mA corresponds to the zero parameter value and the current of 20mA corresponds to the full-scale value, respectively. Modern-day transmitters are therefore often installed with efficient digital communication protocols such as HART and FOUNDATION Fieldbus, which allow data to flow in both analog and digital forms concurrently.
Wiring of the Loop
Hart or Foundation fieldbus devices have specialized wiring requirements that must be followed strictly. Pressure transmitter wiring, for instance, has special considerations where it needs two wires transformer coupled through the case to address the receiver. Loop wiring, both literally and figuratively, joins parts of the circuit. It allows the circuit to more or less naturally become continuous: from the power source, to the transmitter and eventually to the receiving unit. Such cables are shielded to avoid inflow of parasitic currents that may influence the integrity of data being transmitted.
Receiver (PLC, Controller, Indicator)
The receiver, or monitoring device (having the functionalities of a PLC or indicator or Distributed Control System), takes the current value and converts it into the relevant information. For instance, in pressure measurement, 4 mA could be interpreted as 0 PSI, while 20 mA might be read as 100 PSI or more. Some types of receivers allow one to look at pictures or use the device to initiate actuators according to the given values.
Further Facts
Accuracy & High-Resolution
The 4-20mA technology offers very high accuracy, while the majority of flow meters can measure within ±0.1% of full scale. In highly sensitive industries such as oil and gas, measurements have to be precise.
Distance Capability
Transmission of signals is possible for fairly large distances, in some cases up to 1.5 km with cables (i.e., approximately 5000ft) without any noticeable degradation. This is largely achieved because the current signal’s less sensitive to voltage drops than voltage signals.
Integration with Digital Technologies
Digital protocols that are embedded, such as HART, are compatible with 4 – 20mA systems. They provide additional functions, for instance, diagnostics, tracing of changes in the device, as well as recalibration or configuring the device remotely, which enhances maintenance and minimizes downtime.
Using all the above elements, the field-proven 4-20mA current loop system is still an effective solution in field instrumentation systems.
Step-by-Step Wiring Instructions

Correct and accurate wiring of a 4-20mA current loop network is vital during its execution. Step by step instruction shall be provided for how these systems are wired:
Tools Required
- • Transmitter (a signaling device)
- • Power supply (generally, it is a 24V DC)
- • Receiver of current loop (for example, indicator, control system, PLC)
- • Connecting cables (for instance, shielded twisted-pair cables which are designed to generate less noise)
- • Multimeter (it is not compulsory but it can be used for verification)
1
Check the Direction of Poles
Make sure that the positive (+) and the negative (-) poles for all the transmitters, the receivers, and the power supply are correctly identified. Even a simple mistake in this directionality causes a circuit to work out hardly unless it is protected. Otherwise it may be fatal to the user.
2
Inserting the Transmitter in Series with the Power Source
Connect the DC power supply to the transmitter’s positive terminal. For instance, When a 24V DC supply is installed, it is the red wire that should be installed in the indicated terminal.
3
Close the Provided Receiver
Repeat the process for Pressure Transmitter Wiring.
Attach the negative node of the transmitter to the input port of the control receiver device (PLC, DCS). Afterwards, return the receiver device’s output port to the negative terminal of the DC supply, forming a loop.
4
Check the Loop
Make sure all connections are completed in a good and right way. A current signal will fluctuate if connection lags.
5
Add Shielding and Grounding
In order to minimize any interference, such cable should be grounded only from one end as to avoid any ground loops. Most working environments, especially in electrical milling, pose high electromagnetic interference (EMI).
6
Test a System
Put power on and connect a multimeter in the loop in such a way that it measures the current. The current appears between 4mA and 20mA dependent on how much current is sent from the transmitter.
Examples of Measured Physical Values:
If the sensor in the system is 25% of the range, the system will display about 8mA.
When the sensor detects 100% range, the transmitter output shall be exactly 20mA. Make the necessary adjustments to the system to calibrate these values as required.
The instructions and guidance below will help you understand the pressure transmitter wiring and install it for use. With adequate construction, frequent checking and testing, all these factors will enhance its durability and effectiveness in all scenarios where it is to be used in industry.
Wiring a 2-Wire Pressure Transmitter
2-wire pressure transmitters have widespread industrial relevance due to their easiness and utility. Given the pressure transmitter wiring, how can you ensure the transmitted signals remain stable and accurate? Below are the important guidelines for addressing 2-wire pressure transmitter wiring:
Attaching Power Supply Wires
To turn up the pressure transmitter, it utilises a direct current power source, usually in the range of 12 volts to 36 volts. The positive lead of the transmitter should be connected to the power supply’s positive terminal (+V). The negative terminal (-V) is attached to the ground of the control system, or one of the control loop elements.
Transmission of Signals
The transmitter works on 4-20mA current loop principle. Make sure there is no change in the loop current, and its flow through the receiver (like PLC, Controller) is in series with the transmitter. Moreover, such a loop has, additionally, a receiver component, and thus the higher the pressure measured, the larger the loop current, whereas at industrial site 4mA will stand for 0, and 20mA will imply maximum pressure levels.
Checking of Polarity of the Terminals
When placing a sticker beneath the probe, you should also verify its poles, which are usually specified on the transmitter. The transmitter could be damaged or cease to function with the correct way round power polarity.
Connecting the Cables as well as the Shielding
The cables should be shielded where possible, and high quality cables should be used to produce little or no Electro-Magnetic Interference. Use a suitable form of mechanical or plug strain relief for all cable entries to avoid severe flexing of the connections.
Sample Data for the System
Level 0: At 0% of the pressure-raising scale, the transmitter is supposed to read 4 mA. This is confirmed using the loop by connecting a multimeter in series.
Level 100: At a hundred percent of the sensor range, that is, the maximum pressure, the current is 20mA. This practice helps ensure that the transmitter’s range scales the signal’s pressure correctly.
Intermediate Values: at, for example, 50% of the sensor’s range, the current should be 12 mA. Take measurements at several points across the range to assess the device’s linearity.
Earthing
Noise cannot be prevented to ensure safety except through proper grounding. In order to remove any ground loops, the cable shield should be bonded to ground on section of cable only.
Examination of the Loop
Subsequent to the connection of appropriate cables, conduct a test by simulating low, mid and high pressures. Monitor the control system output and ensure it remains operational and accurate.
This procedural guide, as well as the associated calibration instructions, ensures good practice of pressure transmitter wiring and guarantees the high conductivity of two wires pressure transmitter. In case of any deviations or changes, consulting the manufacturer’s instructions is necessary.
Wiring a 3-Wire Pressure Transmitter
Prior to undertaking any pressure transmitter wiring, you must comprehend the due consideration that should be paid in three – wires pressure transmitter facing the direction of the pipe. Generally, such a 3-wire configuration 3-wire pressure transmitter will have v+ terminals for a positive DC supply, gnd … junction for the return current or negative potential, and an out terminal for the signal out of the sensor. More detailed instructions on how to wire a 3-wire pressure transmitter are outlined below:
Wiring Diagram
First and foremost, examine the manufacturer’s wiring diagram to determine which terminals are meant for V+, GND, and OUT. The system voltage should match that specified for the transmitter; the input voltages for such equipment usually range from 12V to 36V DC.
Power Supply (V+ and GND)
The V+ terminal of the transmitter is connected to the positive supply lead of the power supply. The negative lead of the power supply is connected to the GND terminal. This step ensures the correct voltage is applied to the transmitter.
Signal Output (OUT)
The signal output of wire (OUT) is connected to the input channel of a control system or a programmable logic controller (PLC). This is done after ensuring that the input channel is suited to the type of output signal, for instance, whether a voltage signal, let us say 0-10V, or a current, let us say 4-20mA.
Safety and Ground Connection
This is important for any electrical connection in increasing the reliability of such a system. In case one is to use shielding, the shield wire should be earthed according to the manufacturer’s guidelines. Ensure no ground loops are created by making only one ground connection.
Check the Wiring
Once the connections have been made, turn on the system and observe the transmitter’s output. A test pressure should be applied to the device to ensure that the signal output is as per the pressure that is applied. For instance, in the case of 4 – 20mA, 4mA represents the zero pressure and 20mA represents the highest pressure.
Example Data for a 3-Wire Pressure Transmitter
Additional Tips
- Confirm whether the transmitter’s output form matches any of the inputs to the control system or PLC to which it is connected.
- Reconfirm the complete connections of the wires in order that there does not occur any short circuit or any wrong measurement of output.
- It is advisable that once the instrumentation has been installed, it must be specifically calibrated for the particular applications.
Though simple, the three-wire pressure transmitter wiring – wiring a 3-wire pressure transmitter network correctly enhances process efficiency and also assures system effectiveness and safety within the pressure monitoring systems. Consult and adhere to the standard operating procedure of the maker’s instructions while proceeding with the wiring.
Wiring a 4-Wire Pressure Transmitter
Whenever you discuss wiring of pressure transmitters, especially for 4 wire systems, it has to be carried out with utmost precision so as to make sure all the necessary parts function as intended and provide accurate measurements.
This is a 4 wire transmitter, so both power and signal are connected through separate cables. Such design implies some advantages for systems where very stable and, at the same time, maximally noiseless signals are demanded over relatively long distances.
Wiring Diagram & Steps
Power Supply Ports
Open every positive terminal in the circuit, including the positive supply line running from the source of power (usually 24VDC or so), and connecting it with the positive Power Supply Terminal of the transmitter. Join the negative lead of the power source with the negative lead on the power supply connected to the instrumentation.
Signal Output Ports
In the output, usually analog, connect the positive side of the signal of the transducer to the corresponding input terminal of the device receiving the signal i.e. controller, plc, or any other device as the case may be. Attach the negative lead of the signal to a pulse, or to the negative terminal feed of a stepped signal.
Grounding
A good grounding system minimizes the effects of electrical noise. Ground the specified ground terminals provided by the manufacturer to a certain, known, and trusted earth so that signals remain clear.
Specifications of the Device
Power Supply(ies):
Many 4 – wire transmitters do not operate by themselves and therefore need an additional power source from 12 V to 36 V DC.
Type of Signal Output:
The current is given in two formats: 4-20 mA and/or a voltage of 0-10 V, digital (e.g. RS485 Modbus) or both depending on the type.
Cable Length:
In a 4-20 mA system using multi-core shielded wires, the signal cable can be pulled to a maximum length of 5000 feet to avoid performance deterioration.
Benefits of the 4 Wire Configuration
Separate Power Supply:
With conventional 2-wire transmitters, signal and power supply cables are a single cable, but with 4-wire transmitters, the cables are separated, minimizing interferences, and assuring better measurements.
Enhanced Signal:
It especially helps such applications in environments saturated with strong, unnatural electrical fields.
Please make sure that all connections have been made correctly, exactly as recommended in the manufacturer’s wiring diagram. Use a multimeter to check for any high peaks or unhealthily low input/output levels. Where installation is concerned, these must be in place to ensure the basic standards or codes are considered including any specific site safety codes.
Common Pitfalls in Pressure Transmitter Wiring

The use of a pressure transmitter wiring is a very subtle subject that can be easily mishandled if not installed and maintained most appropriately. The following are some of the problems in wiring and reasons for such problems and steps to avoid them:
1. Wrong Wiring Connections
Explanation: This occurs when the terminals are connected with the polarities interchanged; the positive terminal is connected to the negative terminal or vice versa – this is referred to as a reversed polarity and this can cause the equipment to function improperly or even get damaged in the process.
Effects: It accounts for quite a number of pressure transmitter system failures during installation because either the signals were missing or were off.
Control:
- Confirmed the connections strictly with respect to the wiring diagram provided by the manufacturer.
- The installation should be done using very well marked cables of good quality to eliminate chances of confusion during installation.
- Check the polarity with a multimeter prior to applying power.
2. Issues with Grounding
Explanation: A good example of improper grounding would be failing to connect the zone to prevent earth loops. Without adequate grounding, a zone may have earth loops, which would introduce noise in an area hosting the transmitter, leading to stability and accuracy problems.
Impact: It is estimated that one in five (20-30%) signal errors in the industrial instrumentation field could be attributed to grounding issues.
Prevention:
- Ascertain that the ground wire is connected to its own grounding point.
- Do not combine several devices’ grounding wires on one device as it may cause interference.
- Make sure grounding electrodes are checked regularly and replaced if they are broken or corroded.
3. Problems with Cable Shielding
Description: Without an effective shield, external electromagnetic interference (EMI) from surrounding equipment, cables, and devices can distort the pressure transmitter wiring.
Impact: As stated by the International Electrotechnical Commission (IEC), poor shielding is among the leading causes of signal quality problems in industrial control systems.
Avoidance:
- Apply quality shielding standards to cables such as twisted wires and double-shielded cables.
- Single-point grounding of the shield cable.
4. Inadequate Power Source
Description: Incorrect Power supply or power instability can lead to damage to the instrument or erroneous outputs. Pressure transmitters require 24V DC supply. External voltages outside the specified range cause signals to become unstable or even cause the system to fall apart.
Prevention:
- Ensure To check the exact voltage of the power supply by applying a multimeter prior to the connection.
- There is a need for powered power supplies with surge protectors at the input to provide a steady output.
5. Environmental Influences and Cable Arrangement
Description: The cables are in a hostile environment during installation or are close to the sources of heat, moisture, or vibrations which causes the cables to deteriorate very early and the signals to diminish.
Impact: Through field studies, it has been noted that improper pressure transmitter wiring, among others, contributes up to 15% of the performance issues in the transmitters over the course of their life.
Preventive Measures:
- Keep these cables in areas that are not exposed to excess temperature and any form of bustable machines.
- You can use conduits or utilise cable trays to prevent the cables from damage, especially in environments with harsh conditions.
- Cables and connectors for outdoor installations should be only weatherproof.
6. Failing to Maintain the System
Information: If the wiring connection is not inspected, cleaned, and serviced, it will eventually get dusty, corroded, or worn out.
Consequence: It is estimated that almost 1/2 of the in-service failures of wiring and instrumentation over a long period are due to a lack of care.
Solution:
- Check loose connections and those that are rusted, at least once a year.
- Make sure all screws are properly fastened and that insulation is checked.
- If any wires or connectors are damaged, they should be replaced.
7. Not Recalibrating After Component Mounting
Information: Pressure transmitter wiring and mounted equipment frequently disturb the calibration of the device and if re-calibration is not conducted, the readings will be off. When installed transmitters are not properly tuned or adjusted, this leads to increased operational costs and functional inefficiencies.
Solutions:
- Employ recommended testing equipment to check and correct the output signal.
- Recalibrate as directed by the manufacturer after installation and regularly thereafter.
In Conclusion:
By addressing these common problems, many challenges in pressure transmitter wiring installation can be overcome. Using components of good quality in a proper manner and in accordance with all the instructions accompanying the manufacturer of the equipment, and performing periodic checks, enhances the level of accuracy and dependability of such systems. Always stay up to date with modern trends and technological advances to best accommodate the industrial instrumentation environment.
Common Wiring Mistakes to Avoid
⚠️
Inadequate Electrical Grounding
When a pressure transmitter wiring or cable refers to a device that is used for pressure measurement, but is not grounded well, there are possibilities of noise or incorrect activity. Be sure to connect the grounding system in accordance with the design requirements so that the signals remain effective.
⚠️
Using the Wrong Types of Cables
Using the wrong type of cable relative to the shield or wire thickness does not make sense, as it does not provide protection against signal loss from EMI. Thus, only the cables set out by the makers support optimal function at any other time.
⚠️
Polarity Issues
Connecting from the wrong direction of polarity could damage the transmitter or cause the malfunctioning of the device. Never stress this enough – you must re-cable and re-test polarity as these so none of you experience headaches.
⚠️
Weak or Unstable Connections
The system’s components or structures generate the signals, electrical signals, and their design causes severing of these wires due to loss, and such scenarios lead to system breakdown. Those structures ensure that the material exists securely and that all of the joints and welds are tight and checked while working on installations.
⚠️
Pulling Wire Close to the Power Lines
When signal wires run parallel to high-voltage cables, they can introduce electromagnetic noise, which causes measurement inaccuracies. Ensure adequate separation between cables and adhere to good cable management principles to avoid such cases.
Understanding Signal Interference (Detailed Analysis)
The term describes alterations, variations, or distortions in the signal’s quality due to external or internal elements, which can have a profound effect on how electrical or communication equipment works. This happens when undesired signals emanate from different sources, interfering with the desired signal, leading to unwanted changes, degradation of accuracy, or complete failure.
Classification of Interference in Signals
Electromagnetic Waves (EMI)
This may be as a result of interactions with nearby electric appliances, heavy equipment, or electric cables that cause EMI, disruptions in communication between systems such as those found in industries or populated areas such as cities.
Sample Fact: Researchers have found out that telemetry inaccuracies of up to 30 percent may be due to noise signals caused by EMI from industrial operations.
Radio Frequencies (RFI)
Since radio, Wi-Fi, or mobile devices are within the same range, it is common for them to interfere with one another, thus creating problems when communicating wirelessly. Signal distortion is a major problem in signal processing for manufacturing technologies. This issue becomes apparent when extending pressure transmitter wiring from board to board as the signal loses its power and becomes distorted.
Sample Information: As per a report on urban markets, 55 percent of users of wireless devices encounter RFI problems, the majority due to the density of equipment in use.
Cross Interference
Subject to the configuration of faster networks or inferior cable shielding arrangements, the proximity of cables can cause ‘signal bleeding’ of each others signals.
Noise in Environment
Factors related to the natural environment, such as the presence of storms or solar radiation, might bring in undesirable noise in the transmission.
Issue Observation: Following lots of tracking by NASA, it is possible to show that excessive such activities contribute to the loss of GPS signals or the long seconds freezing of the navigation.
Ways of Reducing the Level of Noise
Using High-Quality and Properly Shielded Cables
Aluminum foil and wire mesh are now used in innovative ways to shield signal cables from extraneous interference. Pressure transmitter wiring must meet industry standards to eliminate or minimize interference.
Bandpass Frequency Filtering
These filters may help minimize unwanted signals in data and improve efficiency. For example, in a 4G LTE network, filters are used to minimize RFI caused by other users within the frequency band.
Cable Routing
An appropriate distance should be maintained between cables to be grounded to avoid crosstalk. Multimedia cabling standards require that low and high voltage circuits be separated by at least 12 inches.
Innovative Technological Approaches
Particularly, adaptive noise and interference cancellation based on artificial intelligence is integrated into sophisticated communication networks to help reduce interference in real time.
The Worldwide Influence of Signal Noise
Each year, signal interference is responsible for an approximate loss of about $22 billion to various industries, including telecommunications, transportation, and manufacturing. The impact of interference must be appreciated in the changing network environment, which is increasingly supporting IoT devices, autonomous systems, or enhanced 5G connectivity.
Countering signal interference, and thus ensuring uninterrupted and unyielding operation of systems, can only be accomplished by the use of proper design, better shielding and most importantly, continuous monitoring.
Checking Power Source Compatibility
Functional and safe electronic devices are closely related to the power sources they use, or more specifically, their suitability to the device. It is quite common for devices that are made to function with a particular kind of power source to fail, overheat, or encounter problems with their delicate parts. The results of a study reveal a global trend of abandoning proprietary power solutions in favor of emergence of global trends of ubiquitous power solutions for products, of which USB Type-C presents the best example. In this case, USB-C Power Delivery has a maximum power output of up to 240 watts (in the present USB PD 3.1 update), allowing high power gadgets such as notebooks or displays to be powered.
When the evaluation of compatibility is conducted, it is equally vital to check the voltage and current ratings of the source as well as the device. This is because a voltage rebellion results in a dead circuit or underperformance of a component. Consider a usual smartphone charger that works at 5V and 1A, whereas a high-performance device may require 20V and 3A. This calls for the incorporation of smarter charging technologies, such as GaN (Gallium Nitride) chargers that generate minimal heat, along with transferring power in an efficient manner.
Moreover, companies that roll out IoT equipment or platforms on a large scale are more and more habitually incorporating power modification testing at the design stage. The application of devices such as smart circuit breakers and power detectors, which allow for continuous monitoring of power interruptions, is also on the rise to minimize delay and improve reliability. As the number of IoT connection devices is forecast to surpass 29 billion by 2030, easier power interfacing integration will be the primary concern for any user of the technology, whether in consumer goods or industrial applications.
Troubleshooting Tips for 4-20mA Current Loops

Many critical components of all automated processes and control systems include 4-20mA loops made of their simplicity and reliability. Some problems, even if few, may, however, sometimes arise that might hinder the transmission of accurate signals. These are usually unrelated challenges and troubleshoot any problems that comes outside the management control system.
How to Fix a Broken 4-20mA Loop
Check Connections and Wiring
This should be the first thing to check, ensuring that all contacts are tight and free of wear and tear. If the connections are loose or corroded, they can cause the signal to go and come, or even cause the current loop to fail completely.
Verify the Loop’s Current
A probe can be used to check the current in the loop. The current through the loop should be between 4 and 20 milliamperes. If the measured current is not in the correct-provided range, such as 4 – 20mA, there might be an interrupted wire in between, a shorted circuit, the instrument is not working, etc.
Examine Power-Supply to the Device
Check the voltage and make sure that it can power the devices. Voltage drops or even failures of the power supply will occasion signal loss or reduction within the loop.
Check Each of the Components in the Loop One after the Other
The defect can be cut down by checking all parts i.e. transmitter, receiver, and even the wires if the case demands. Defective devices may be the cause of distortion or obstruction of the existing signal.
Verify If there are any Ground Loops
Such protected loops can cause misreading of signals or even distort the signals. Remember the correct earthing procedures and get rid of unwanted connections that facilitate circulation of currents all around.
Key Insight: There is a high probability that the 4 to 20 milliamperes current loop problems will be identified if these procedures are followed since the measures are effective, and every bit of processing and production time is important.
Identifying Signal Issues
The underlying causes of inadequacies in the 4-20mA instrumentation circuits could be multifaceted. Knowing the prevalent causes would be immensely helpful in troubleshooting:
Faulty Wiring
Statistics reveal that the faulty or deteriorated wires account for almost 30% of the communication problems. When any cables wear out, joins allow moisture and the wires are not terminated properly issues come up regarding no signals or incorrect values.
Erroneous Generation of Electrical Noise
What is called a noise in the signal line distortion of the loop signal, which is typical of most industrial settings, especially surroundings, animals operated by motors, transformers, and such equipment. Such signals can include noise causing the data within the communication loop to falter. Use of grounded cables or wire separation techniques (SIGNAL wires from 12′ of power cable) can drastically lessen the effect of sports exercise.
Grounding Techniques so Far Available are Not Correct
Again, here improper pressure transmitter wiring can potentially cause ground loop problems between the controller and the input device.
Certainly, ground loops facilitate several errors, as they allow undesired currents to flow through other paths, thereby affecting the measurements. An IEEE report suggests using single-point grounding techniques and separating signal and power grounds to address these problems.
Sensors and other devices are overloaded or failed
Some of the installed sensors or transmitters might overload or stop working due to age, extreme environmental conditions, or incorrect calibration. Remedy: Periodical maintenance and checking of output values on the equipment against standard values allow detection of defected devices. The use of current diagnostic tools, e.g., the HART communicator, can spot the sources of these problems.
Problems With the Power Source
It is essential that the power supply can sustain the current loop and all devices in the loop. The voltage should not drop below the threshold, which in many cases occurs when the available power supply is weak or the cables are too far or there are numerous loads in the loop. This can cause all the loads in the current loop to function less effectively or not at all. To solve such issues, it is always better to ensure that the available voltage is able to cover the overall voltage drop across the current loop.
Pressure transmitter wiring comes to the appreciating environmental conditions
The degradation process of loop components, particularly in cases where they are installed outdoors, is significantly reduced when there are high temperatures and humidity or exposure to corrosion. There is a wide range of modern weatherproof and robust housings that can shield those fitted gadgets from damage for a relatively long time.
Summary: The performance of the 4-20mA current loop systems can be considerably improved by fixing these factors and applying preventive maintenance to the system.
Testing the Pressure Transducer
The Pressure Transmitter is designed to work within a 4-20mA current loop system. I would first check that the pressure transmitter wiring has been done correctly and that the loop power or other power sources are switched on. I would then connect a multimeter to measure the I-V curves of the device at the outputs to see if it is operating within the design range at the given known pressure values. I would also verify pressure readings against a calibrated pressure source to confirm the transducer’s accuracy. This helped me find a number of issues related to the calibration process and quality very fast.
Using Multimeters and Other Tools for Troubleshooting
Especially in cases of examining a 4-20mA current loop system or other kinds of systems, the use of appropriate equipment is indispensable for proper analysis and solution of problems. The following is a list of five such tools and how they work.
Digital Multimeter (DMM)
An executing digital multimeter is needful as it measures voltages, currents, and resistances in the circuit. In diagnostics, DMM helps in verifying the current supplied by the loop, checking the voltage levels and calculating the resistance of the loop.
Loop Calibrator
A loop calibrator is important to test and simulate 4-20mA signals for operation. It is used to inject specific current readings into the devices thus enabling verification of each device connected to the circuit, such as a transducer or a controller.
Signal Generator
It is an equipment which is used to create electrical signals at desired levels and is helpful for checking what happens to devices when the input changes. It complements the loop calibrator by enabling signal testing in more ways.
Loop or Loop Simulator
As the name suggests, it is a special kind of advanced device that helps signal simulators work, since it accurately provides the wrong signal to the device in question.
Clamp meter
This is used in investigating pressure transmitter wiring or other field calibrations where probes cannot fit the terminals, hence prohibiting the terminals’ access to right angles where one can insert probes to measure current.
Oscilloscope
An oscilloscope is used to detect and evaluate rapid changes in electrical signals. It can show disturbances, ripples, or other deviations within the current loop, which can cause any reduction in the system’s performance.
Thermostat Circuit
A thermostat circuit is used to produce or gauge specific temperature values, and, since such temperature values especially matter in many cases of equipment diagnostics, it would be more appropriate to have a list of such circuit arrangements, especially because the operational limits of the sensors and transducers will be different at different temperatures.
Important Note: Keeping these tools available is critical to resolving problems in a systematic and organised way. This allows the issues also to be resolved effortlessly and the system remains properly operational and functional.
References
- Acromag: Introduction To The Two-Wire Transmitter And The 4-20mA Current Loop – A detailed academic-style document explaining 4-20mA current loops and their applications.
- The Transmitter Shop: 4-20 mA Transmitter Wiring: 2-Wire, 3-Wire & 4-Wire Guide – A comprehensive guide on different wiring types for 4-20mA transmitters.
- SensorsONE: How to Connect a 4-20mA Current Loop Pressure Transmitter – A practical and authoritative resource on connecting devices in a 4-20mA current loop.
Frequently Asked Questions (FAQ)
What are 4-20mA tradition current loop transmitters?
A current loop sensor, or in this case, a 4-20mA current loop transmitter, is a kind of transducer that is used to measure dimensional quantities like pressure and then transforms these quantities into electrical signals with current values usually spanning 4 to 20 milliamperes. Current loops allow the reliable transmission of signals over long distances, thus making them a popular choice for many industrial applications.
Explain how power 4 to 20 mA sensors are connected?
In most cases, wiring of any 4 to 20 mA loop sensors involves the responsibility of connecting the sensors’ output to the receiving device, such as a controller or PLC. In case a hydraulic pressure module is in place and a two-wire setup is there, attach the positive wire of the module to the positive of the power source and the negative contact to the receiving end of the device, like a display unit or control mechanism. In the case of a three-wired arrangement, a third wire is used to provide a power supply, improving measurement accuracy and reducing ground loops significantly.
Are there differences between 2-wire and 3-wire pressure transmitter wiring configurations?
The key distinguishing factor involves the connection wire count. The 2-wire installation design accommodates only the signal and power wires, making it easier and cheaper to install. However, the 3-wire design adds power wire that facilitates accurate readings and compensates any voltage drop and ground signals.
What are the steps in case 4-20mA signal is malfunctioning?
To repair the malfunctioning 4-20mA signal, the first step is to look for any broken connections or problems with the power supply. Check for tight connections and ensure that the supply voltage meets the requirements stated for the transmitter. Loop resistance can also be checked with a multimeter to ensure it complies with Ohm’s law.
How do I test pressure transmitter wiring traces that malfunction?
Diagnosing a faulty pressure transducer in a continuous-current loop mechanism requires inspecting the entire circuit system. Check for poor pressure transmitter wiring or damaged wires, try to check the voltage supply and confirm that or check the calibration of the particular transmitter. Moreover, stating the measured current using the belt can also indicate whether the transducer is working normally.
Why is it necessary to use a 250 ohm resistor in the 4-20mA circuit?
For 4-20 mA most of the time a 250 Ohm resistor is used because they convert the current to voltage which can be interpreted by the microprocessors or displays. This resistor allows capturing the voltage across the shunt, which is proportional to the current in the loop, thereby enabling efficient processing and monitoring of the signal.
Is it possible to connect several sensors in the same 4-20 mA loop?
It is feasible when it comes to connecting 4-20mA sensor loops in series; however, it is not advisable to do so. The effect of each sensor on the loop resistance would also cause inaccurate readings. Instead, using a separate loop for each sensor or a multiple input module designed for this purpose is advisable to maintain signal integrity.
How does ‘live zero’ function in terms of a 4-20ma current loop?
‘Live zero’ means that for a 4-20mA current loop application, the minimum output is set at 4mA instead of 0mA. In this way, a broken wire or a power failure condition can be picked up as the signal would drop below 4mA, thus indicating a fault in the loop.