NAMUR NE43 for Pressure Transmitters: Fault Current vs Measurement Saturation
NAMUR NE43 separates failure signals from pressure readings in an analog current loop. At saturation, the transmitter has reached its set output limit. When it sends its set fault current, it is reporting a detected failure. Those two states need different handling, even when the control-room display looks the same.
A reading outside 4–20 mA can be puzzling when the local gauge still looks normal. Should you replace the sensor? Don’t decide from current alone. It doesn’t identify the cause.
This guide connects the measured current, transmitter settings and receiving-channel status, then turns those checks into a commissioning record.
Illustrative scenario: An operator sees a full-scale pressure display. The measured loop current is 20.5 mA, and the transmitter manual identifies that value as upper saturation. The display cannot tell the operator how far pressure has moved beyond the analog limit. Device status and a suitable process reference are still needed before diagnosing a failed sensor.
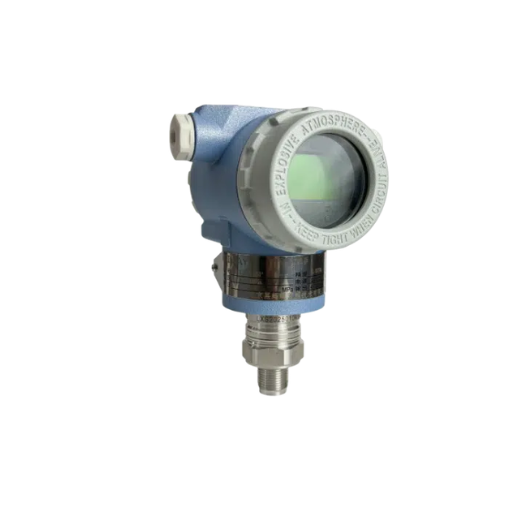
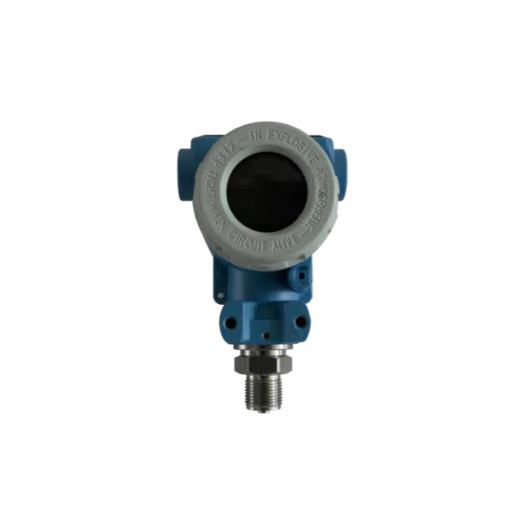
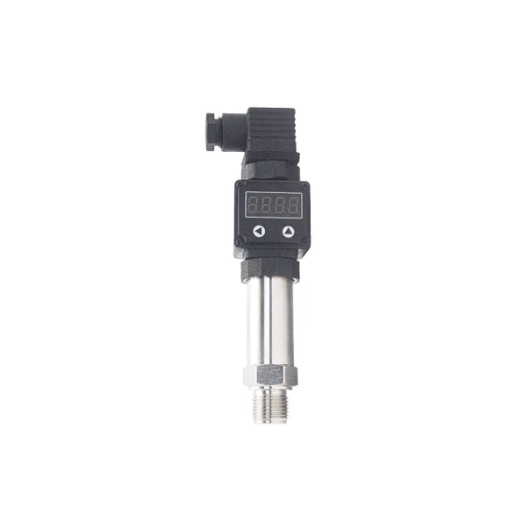
For the nominal signal relationship, start with our 4–20 mA pressure transmitter guide. If you are specifying a unit, review the HPT Series product page and ask for the selected model’s documented saturation and fault settings.
Key Takeaways
- Separate nominal span, extended output, saturation and failure signaling before assigning a pressure value.
- NAMUR NE43 does not mean every transmitter generates exactly 21 mA during a high alarm.
- Read input-channel quality alongside raw current; a clamped display can conceal an invalid signal.
- Test the documented alarm currents and recovery behavior, as well as normal measurement points.
NAMUR NE43 current bands: where saturation ends
Nominal signal, extended signal and saturation
For a linear 4–20 mA output, 4 mA marks the lower range value, or LRV. The upper range value, or URV, corresponds to 20 mA. These are the set ends of the measuring span. They aren’t necessarily the sensor’s physical limits or its fault alarm values.
Some configurations allow the output to track slightly beyond those endpoints before it saturates. At saturation, current stops following further changes in pressure. That current can indicate an out-of-span condition, but it cannot quantify pressure beyond the clamp.
This NAMUR NE43 table uses examples from product manuals. Apply it against the actual model and output configuration, rather than using it as a universal controller setup sheet.
| Observed current or band | Meaning in the cited example | What to check next |
|---|---|---|
| 4–20 mA | Nominal configured measurement span | Range, transfer function and signal quality |
| Between nominal span and a saturation endpoint | Extended output may still track pressure | Manual limits and permitted measurement use |
| 3.8 or 20.5 mA | Saturation endpoints in the cited NAMUR configuration | Process condition, range and device status |
| At or below 3.6 mA | Low-alarm region in the cited Emerson configuration | Selected alarm mode, diagnostics and loop condition |
| At or above 22.5 mA | High-alarm output in that Emerson configuration | Receiver acceptance and available loop voltage |
| Between saturation and documented failure levels | Interpretation needs the applicable detection rules | Input accuracy, margins and configuration |
| Near zero | Loop is not carrying its normal live-zero signal | Supply, continuity, connections and device condition |
These saturation and alarm examples come from Table 2-4 of the Rosemount 3051 legacy-protocol reference manual, Rev KB, August 2018. They apply to the modes in that manual. Check the manual for your own device and revision.
Fault regions need detection rules
NAMUR NE43 separates failure information from the measurement signal. The transmitter generates an output; the receiving system must recognize its meaning. Its documented detection limits, tolerances and quality flags therefore matter as much as the transmitter’s alarm setting.
Do not classify a value close to a boundary from a rounded HMI number. Record the reference measurement and its uncertainty, then compare the receiving channel’s documented behavior. An intermediate reading deserves investigation rather than an improvised fault threshold.
The early scenario illustrates the practical distinction: 20.5 mA at a documented saturation endpoint is not, by itself, a self-diagnostic failure announcement. The pressure condition may still require action under the plant’s operating rules.
Why NAMUR NE43 fault currents differ by model
Compare manual rows, not a mnemonic
The NAMUR NE43 high-fault boundary is a detection limit. The current a transmitter sends during a fault can be higher. A receiver may detect a high alarm before the transmitter reaches its selected failure current. Confusing those numbers can produce a false diagnosis or an incomplete loop test.
For example, the cited Emerson NAMUR NE43 row specifies a high alarm of at least 22.5 mA. The Yokogawa IM 01C25F01-01E manual, 12th edition, October 2014, lists option-dependent examples in its C2/C3 table: a high failure output of at least 21.6 mA or a low failure output of at most 3.2 mA. Both examples require their own model and option checks.
Neither example establishes Black Ant product behavior. An order code, output protocol or selected mode may change which manual row applies. Before interpreting a NAMUR NE43 alarm, record:
- Full transmitter model and hardware option.
- Firmware version, where it affects the settings.
- Manual revision and the applicable table row.
- Selected alarm direction and output mode.
Check whether the device uses a switch, software parameter or ordered option to select that direction. Also record the lower and upper saturation limits. A “4–20 mA” label is not enough. A broad family brochure may also leave the chosen option unclear.
Check startup behavior separately
The NAMUR revision notice published July 27, 2021 says the 2021 changes concern signal-detection margins and device behavior at startup. This is useful historical context for NAMUR NE43 integration, rather than a new 2026 requirement announcement.
The public notice doesn’t give the full set of thresholds or delay times. Obtain the applicable device and receiver documentation, and test startup separately from a steady-state fault. Do not create a universal startup delay from an abstract.
Where a transmitter provides digital diagnostics, collect them alongside analog current. Our smart pressure transmitter guide explains the broader communication context. A digital status message can add detail; the analog alarm current alone does not name the failed component.
Read status before scaling a pressure signal
Keep signal quality and process alarms separate
When you use NAMUR NE43, keep pressure, signal quality and device status separate. A high-pressure alarm describes the process. A device failure alarm warns that you may not have a valid reading. Saturation means the output has reached a limit.
It may no longer show a usable pressure value.
Your input card may report raw counts, current, an overflow flag or a fault status. Read its manual to establish which information remains available beyond nominal span. Don’t assume that raw counts or overflow behavior match another input-card model.
As one implementation example, the Endress+Hauser RMC621 technical information, page 5 lists fault recognition at the 3.6 mA and 21 mA limits. That receiver example helps explain NAMUR NE43 detection, but it is not a programming specification for an unrelated PLC.
A scaling calculation can create false confidence
Illustrative scenario: Assume a linear 0–10 bar range. Its nominal conversion is:
Pressure = LRV + ((current_mA - 4) / 16) × (URV - LRV)
At 20.5 mA, that arithmetic returns 10.3125 bar. If the transmitter is clamped at 20.5 mA, however, 10.3125 bar is only an extrapolation. It does not prove the actual pressure. Clamping the HMI to 10 bar hides even that visible clue.
Start a NAMUR NE43 check with channel and device status. Is this a valid reading, saturation or a fault signal? Use current as a pressure reading only when its quality and the selected transfer function allow that use.
Keep the quality indicator visible wherever operators rely on the pressure value. If the system holds an old value, mark it as stale under the approved control design. A retained number must not silently appear to be a fresh measurement.
Check sensor range and configured span separately, too. The math alone can’t show that the sensor is within its allowed range. Use the instrument’s documentation and process limits to resolve that question.
Our pressure transmitter wiring guide covers the physical connection context. For NAMUR NE43, also preserve channel status through scaling and display. The sequence here is a commissioning method, not executable safety logic.
Keep an event log with separate fields for pressure, raw input and quality. That lets a technician compare what changed first. If only the displayed pressure was saved, the record may lack the detail needed to explain an alarm.
Trace a suspicious current through the whole loop
Preserve the event before resetting equipment
An occasional 3.6 mA reading doesn’t prove sensor damage. Capture the time, measured current, terminal voltage, transmitter status and input-channel status together where practical. A power reset can remove the condition before those observations are collected.
Compare the field measurement with the receiver reading. If they disagree, check the interface between them. Check the channel settings and how you measured current, too.
If they agree, investigate what that current means in the transmitter’s selected mode. NAMUR NE43 gives a framework for interpreting the signal; it does not replace fault diagnosis.
Near-zero current also has several possible explanations. Loss of supply, an open circuit, a connection problem or a device condition can interrupt the normal signal. Use the approved troubleshooting procedure to distinguish them instead of treating one number as a root-cause code.
Verify voltage at the required alarm current
Illustrative scenario: A loop passes its 20 mA check but cannot sustain a configured 22.5 mA alarm. Assume a 250 Ω receiving burden. It drops 5 V at 20 mA and 5.625 V at 22.5 mA, an extra 0.625 V before other loop losses.
Those are calculated examples, not measurements from an installation. For a NAMUR NE43 high-alarm test, use the actual output value. Check the minimum voltage needed at the device, too.
A good supply reading at the cabinet is only one check. Measure voltage at the field device at the required current, too.
Use our 4–20 mA loop power budget worksheet to check the complete voltage balance before changing the supply or replacing the transmitter. Include cable resistance and the documented drops of any barriers or interfaces.
Does the isolator or signal conditioner accept the selected alarm current? Check its input limits. Then verify what its output does with that state. An interface that clips the signal may prevent the receiving system from seeing the intended NAMUR NE43 indication.
Use current, status and voltage to choose the next test. Has the original fault gone? Does the loop recover as required? Check both before you close the repair.
For other symptom branches, use our pressure transmitter troubleshooting guide.
Prove fault handling with a loop-check worksheet
Agree the test state and baseline
A normal five-point calibration does not demonstrate end-to-end NAMUR NE43 fault handling. Calibration checks how pressure maps to current. Current injection tests the receiving path.
A loop-test function can drive the transmitter’s current output. It doesn’t prove that the device will detect every sensor fault.
Arrange the test under the site’s approved procedure, with affected operations informed. Use suitable test equipment and the correct source or simulation mode for the circuit. Do not connect competing current sources or create a hardware fault to obtain an alarm.
Fluke’s mA source testing guide describes applying current to a controller input and checking the indicated result. The distinction matters for NAMUR NE43: injection verifies downstream response to the applied signal, rather than the pressure sensor’s own diagnostic coverage.
Test nominal points, limits and recovery
- Record the configuration. Save tag, full model, manual revision, pressure range, output mode, saturation endpoints and selected alarm direction.
- Check nominal span. Use appropriate 4, 12 and 20 mA electrical tests to verify receiving-channel scaling. Record the applied and measured values separately.
- Check the documented limits. Apply or command supported saturation and failure-current values using the approved method. Confirm that equipment ranges cover the required high current.
- Observe the complete response. Record raw input, signal quality and the HMI reading. Compare the response with the approved design. Include terminal voltage when testing the actual transmitter output.
- Verify recovery and restoration. Return to a valid measurement state, confirm quality recovery and restore normal settings. Test startup behavior separately where the applicable procedure requires it.
Use a NAMUR NE43 record that makes expected and observed behavior easy to compare:
| Test state | Command or injected mA | Reference mA / terminal V | AI raw value / quality | HMI / expected response | Observed response / restoration |
|---|---|---|---|---|---|
| Nominal low, midpoint, high | Record each point | Record actual readings | Record each state | Enter approved expectation | Record observation |
| Selected saturation limits | From model documentation | Record readings | Record status | Identify output limitation | Record observation |
| Selected failure output | From model documentation | Record readings | Record fault indication | Enter approved response | Record observation |
| Recovery and startup | Procedure-specific | Record readings | Record quality transition | Enter approved behavior | Confirm normal service |
Keep NAMUR NE43 electrical and pressure evidence distinct
For loop setup and result documentation, the Beamex video below provides a pressure-loop calibration illustration. Its verified description covers those tasks; it is not a demonstration of NAMUR NE43 failure testing.
Pair the electrical record with the applicable pressure transmitter calibration procedure. Save as-found conditions and as-left settings. The NAMUR NE43 record should show what you tested. It should also state which sensor fault checks rely only on the maker’s documents.
Specify the transmitter and receiving channel together
What to request before ordering
Ask for a model-specific NAMUR NE43 setup sheet. A general compliance statement leaves key questions open:
- What pressure range and output option are supplied?
- Where are the lower and upper saturation limits?
- What are the low and high failure currents?
- Which alarm direction is selected?
- What does the device output during startup?
Provide the receiving-channel model and its documented accepted current range. Ask how it reports out-of-range input and whether an intermediate interface preserves the fault signal. Confirm the power budget at the highest required output, not just nominal full scale.
The final NAMUR NE43 test record should link these documents to the channel quality, display and recovery you observed. A successful normal-span reading is one part of that record. It does not establish every diagnostic response or certify a safety function.
What the final acceptance record must show
Keep a separate line for each open NAMUR NE43 test item. If the receiver cannot read the selected high current, ask whether its input range or the transmitter option must change. If an interface hides the alarm, test its documented fault-transfer mode. Don’t approve the pair from a normal-span check alone.
Keep the proposed settings and the tested settings together. Record who owns any remaining check and what evidence will close it. This helps the buyer distinguish a documented option from an assumption in the inquiry. It also gives the commissioning team a clear basis for the final test.
For a model inquiry, use the HPT Series Intelligent Pressure Transmitter page. Send the required range, output mode, receiver model and desired fault response. Ask for the model’s alarm and saturation values in writing before choosing it.
FAQs on NAMUR NE43 fault current and saturation
Use these answers alongside the current-band table and the actual model settings. If the signal and manual disagree, keep the finding open and record what remains untested.
Is 20.5 mA a failed pressure transmitter?
Not necessarily. In the cited NAMUR NE43 configurations, 20.5 mA is upper saturation rather than a failure output. Check the actual manual and device status. Once output is clamped, the current cannot show how far pressure exceeds that boundary, so avoid treating an extrapolated value as measured pressure.
Does 3.6 mA prove the sensor is damaged?
No. It can be consistent with a low-fault indication, but current alone does not identify a damaged component. Check the configured alarm value, available diagnostics, terminal voltage and receiving-channel status. Save the readings before a reset, then check whether the device sent a fault signal or the loop could not sustain its normal current.
Why do some transmitters fail above 21 mA?
A receiving system’s high-fault boundary need not equal the transmitter’s generated alarm current. The cited manuals give option-dependent examples above 21 mA. For NAMUR NE43, match the fault output to the input range and fault rules. Then check that the loop can supply that current.
Can a PLC hide a fault current?
Yes. Scaling, clipping or display rules can obscure an off-span value if diagnostic information is discarded. Check the particular input module’s raw data and quality flags before interpreting the displayed pressure. NAMUR NE43 handling should preserve the distinction between a valid measurement, an output limit and a device failure signal.
Does NE43 compliance make a pressure loop a safety system?
No. Fault-current signaling alone does not establish a certified safety function or a safe response for a specific process. Follow the approved safety requirements and equipment manuals for the application. Select alarm direction and system response through that design process, rather than assuming one direction is universally safe.
For a traceable NAMUR NE43 setup, return to the specification checklist above and resolve each open test item. A normal pressure display alone is not a complete acceptance record. Keep the evidence of current, quality and recovery with the final configuration.