How to Commission a Fan Coil Control System: Step-by-Step Field Guide
A commissioning agent named Daniel once handed over a 12-storey business hotel in Doha on a Friday afternoon. The chillers were balanced, the fan coil units were powered, and every thermostat lit up on schedule. By Tuesday, the operator had 40 comfort complaints: south-facing rooms overheating, a few suites that would not cool at all, and a BMS dashboard full of alarms nobody could explain.
The units were installed. They were not commissioned.
That distinction is the entire point of fan coil control system commissioning. Installation proves the equipment is connected and powered. Commissioning proves the control system, meaning the valve, actuator, controller, sensors, and BMS, actually behaves the way the design intends. Most first-year comfort complaints, high energy bills, and “ghost” BMS alarms trace back to control steps that were skipped or assumed rather than proven.
This guide walks field engineers, commissioning agents, and BMS integrators through fan coil control system commissioning in seven practical phases, from pre-commissioning checks to handover. You will get the checklists, a BMS points table, a fault-diagnosis table, and the control-specific detail that generic method statements leave out.
Commissioning a fan coil project and need valves, controllers, and documented register maps? Explore Black Ant’s DN15-DN25 fan coil control valve range →
What Is Fan Coil Control System Commissioning?

Fan coil control system commissioning is the documented process of verifying that a fan coil unit’s control components, including the control valve, actuator, room temperature controller, sensors, and BMS interface, perform to the approved sequence of operation. It goes beyond mechanical installation to prove that the valve strokes correctly, the controller responds to setpoint, every BMS point reads and writes as designed, and the thermostat, valve, and fan act in the right order.
In other words, it answers a simple question with evidence: does this fan coil unit control its zone the way the engineer specified?
Commissioning vs Installation vs Maintenance
These three activities are often confused, and the confusion causes real problems on site:
- Installation is the physical and electrical connection of the unit, valve, controller, and wiring.
- Commissioning is the functional verification that the installed system meets the design intent, documented with readings and sign-off.
- Maintenance is the ongoing inspection and servicing that keeps a commissioned system performing over its life.
A fan coil unit can pass installation and still fail commissioning. A stuck actuator, a misaddressed controller, or a swapped flow and return connection will not show up until someone runs a functional test.
Why the Control System Must Be Proven, Not Just the Unit
Generic commissioning checklists do a good job on the mechanical unit: coils, pipework, condensate, filters, and fan. They are far weaker on the control system, which is exactly where most comfort and energy problems originate. A valve that only opens 60% of its stroke, a controller with the wrong node address, or a BMS point mapped to the wrong register will all pass a purely mechanical check and then fail the occupant.
Before You Start: Documentation and Pre-Requisites
Good commissioning starts before anyone touches the unit. Arriving on site without the right documents turns a structured procedure into guesswork.
Approved Drawings, Sequence of Operation, and the BMS Points List
Confirm the following are approved and on hand:
- Material submittals and shop drawings for the fan coil units, valves, and controllers
- The approved sequence of operation and control logic for each unit type
- The BMS points list, with point names, types, and addresses
- Water-side and air-side schematics, plus low-voltage electrical drawings
- Manufacturer datasheets, register maps, and wiring diagrams for the valves and controllers
If the sequence of operation is not approved, stop and resolve it first. You cannot verify a sequence that has not been agreed.
Calibration Certificates and Instrument Readiness
Every instrument used to take readings, including clamp meters, temperature probes, differential pressure gauges, and flow meters, should carry a valid calibration certificate. Out-of-calibration instruments produce readings that cannot be defended at handover.
Mechanical and Electrical Completion Sign-Off
Commissioning assumes mechanical and electrical installation is complete and signed off, with defects closed. Related systems must be operational: chilled and hot water, fresh and extract air, condensate drainage, the fire alarm system, and the BMS itself. Permits to work and safe access should be in place before testing begins.
Phase 1: Pre-Commissioning (Static) Checks
Pre-commissioning is a set of static checks performed with the unit de-energized or at rest. The goal is to confirm the system is ready to be energized and functionally tested.
Mechanical: Coils, Pipework, Flushing, Balancing, Condensate
Work through the mechanical items methodically:
- Nameplate data matches the specification, and the unit is level with panels sealed.
- Coils are clean and undamaged, with correct pipe size and correct flow and return handing.
- Pipework is pressure tested, flushed, backflushed, vented, hydraulically balanced, insulated, and vapor sealed.
- Gauges, isolation valves, balancing devices, and clean strainers are installed, and valves are mounted in the correct flow direction.
- Condensate pan is clean, the trap is installed and filled, and the drain has the correct fall, typically 1 to 3 percent.
Electrical: Earthing, Supply Voltage, Continuity, Terminations
Verify the electrical side before energizing:
- The unit and components are earthed, and the earth connection is tested.
- Supply voltage matches the unit nameplate within tolerance.
- Cables are correct type and size, undamaged, torqued, labeled, and continuity tested.
- The local motor control panel is installed, and emergency disconnection meets code.
Controls Readiness: Sensors, Actuators, Dampers
Confirm sensors, actuators, and dampers are mounted per the control drawings, labeled, and free to move. Motorized dampers should stroke freely by hand where accessible. Sensors should be in the correct locations: room temperature, return air, supply air, and changeover sensors where specified. A sensor mounted in a dead air pocket or a draft will corrupt every reading that follows.
Phase 2: Control Valve and Actuator Functional Test

This is the phase most generic checklists compress into a single line, “verify valve responds to thermostat.” That is not enough. The control valve is the component that actually meters heating and cooling capacity, so it deserves a dedicated functional test.
Verify the Actuator Signal Type
Confirm which control signal the actuator expects and that the controller delivers it:
- 0 to 10 V proportional (modulating)
- 3-point floating (open, stop, close)
- ON/OFF (two-position)
- 4 to 20 mA on some modulating globe valves
A mismatch here, for example a 0 to 10 V actuator wired to a 3-point output, is a common cause of a valve that never moves. If you need a refresher on signal wiring, see the fan coil control valve wiring guidance in the product documentation.
Stroke the Valve 0 to 100 Percent and Confirm Tight Shut-Off
Command the valve through its full range and observe:
- The actuator drives smoothly from fully closed to fully open and back.
- The valve reaches tight shut-off at 0% with no audible pass and no measurable leakage.
- Travel time is consistent with the datasheet, typically a few seconds to under a minute depending on actuator type.
Record the command signal and the measured position at several points, for example 0%, 25%, 50%, 75%, and 100%.
Confirm Fail-Safe Position and Check for Chatter
Verify the fail-safe behavior matches the design. A normally open valve should fail open for freeze protection on heating coils; a normally closed valve should fail closed on cooling-only applications. Power down the actuator and confirm it moves to the correct position.
Listen and feel for valve chatter and water hammer as the valve modulates. Chatter usually points to an oversized valve, poor valve authority, or a control loop that is tuned too aggressively. A control valve should absorb roughly 25 to 50 percent of the total branch pressure drop; below that, it cannot modulate cleanly, and no amount of commissioning will fix a mis-sized valve. For marginal or high-duty coils, an electric globe control valve with a characterized plug may give more stable modulation than a ball valve.
Phase 3: Controller Addressing and DDC Commissioning
On projects with direct digital control, each fan coil controller must be addressed and proven before it joins the BMS network. Skipping this step is how entire floors end up reporting against the wrong room.
Address Each FCU Controller and Prove It from One Point
Set the node address on each controller, whether through DIP switches, a rotary address, a MAC address for BACnet MS/TP, or a software-assigned Modbus address. Then prove each device from a single point: command a valve or fan stage from the workstation and confirm the correct physical unit responds. If unit 4 responds when you address unit 7, the addressing is wrong, not the valve.
Keep an addressing log that maps each controller address to its room number. This log becomes part of the handover record.
Load Application Parameters and Confirm Local Control
Load the application software and parameters into each controller: setpoint ranges, deadband, fan-speed mapping, valve output type, and occupied and unoccupied schedules. Before involving the BMS, confirm the unit controls correctly on its own by raising and lowering the local setpoint and watching the valve and fan respond.
Calibrate and Prove Sensors
Compare each temperature and humidity sensor against a calibrated reference device. A room sensor reading 2 °C high will make the zone overcool and waste energy every hour it runs. Changeover sensors on 2-pipe systems deserve special attention: an incorrect changeover reading sends the wrong-temperature water to the coil.
Phase 4: BMS Point-to-Point Verification
Point-to-point testing proves that every point in the BMS is wired to the correct terminal, mapped to the correct register or object, and reporting the correct value. It is tedious, and it is where commissioning earns its fee.
Reading the FCU Points List
A typical fan coil unit exposes a mix of analog and binary points. Verify each one against the approved points list.
| Point name | Type | Direction | Example expected result |
|---|---|---|---|
| Room temperature | Analog Input (AI) | Read | Matches calibrated reference within tolerance |
| Cooling setpoint | Analog Value (AV) | Read/Write | Updates from BMS and holds locally |
| Valve position command | Analog Output (AO) | Write | 0 to 100% command drives actuator stroke |
| Fan speed status | Binary/Multi-State Input | Read | Reports low, medium, high correctly |
| Fan start command | Binary Output (BO) | Write | Starts and stops the fan |
| Valve feedback | Analog Input (AI) | Read | Feedback tracks command within tolerance |
| High-temperature alarm | Binary Input (BI) | Read | Triggers and clears at threshold |
| Emergency stop status | Binary Input (BI) | Read | Reports trip to BMS |
| Mode (heat/cool/auto) | Multi-State Value | Read/Write | Correct mode for 2-pipe or 4-pipe logic |
Modbus RTU Register Mapping
For Modbus RTU, confirm the baud rate, parity, and node address match the BMS gateway settings, then read and write each holding register. A Black Ant fan coil control valve, for example, exposes registers for valve position, setpoint, space temperature, mode, and alarm status, and the register map is supplied with the product documentation so integrators do not have to reverse-engineer addresses on site.
BACnet MS/TP Object Binding and Polling
For BACnet MS/TP, confirm the MAC address and baud rate, then bind the relevant objects: Analog Outputs for valve position, Analog Inputs for temperature, Binary Outputs for fan stages, and Multi-State Outputs for mode. Watch live polling on the graphics and confirm each value updates within the expected scan interval. BACnet MS/TP segments are typically limited to 127 devices at common baud rates, so large FCU fleets need addressing planned across segments.
Confirm Graphics Match Field Values
On the head-end graphics, change a setpoint or state and confirm the feedback updates on screen and in the field. Mismatched values between the graphic and the physical unit almost always indicate a mapping or addressing error, not a control failure.
Phase 5: Thermostat, Valve, and Fan Sequencing

Sequencing defines the order in which the thermostat, valve, and fan act. Get it wrong and you waste fan energy, blow unconditioned air, or short-cycle the valve.
Valve Opens Before Fan; Fan Stops Before Valve Closes
The standard sequence is: on a call for conditioning, the control valve opens first, then the fan ramps up once water is flowing through the coil. On satisfaction, the fan ramps down or stops first, then the valve closes. This prevents the fan from pushing air across a dry coil and avoids the draft occupants feel when a fan runs with a closed valve.
Occupied, Unoccupied, Setback, and Setpoint Reset
Prove the occupied and unoccupied schedules from the BMS time clock. During unoccupied periods, the heating setpoint should drop and the cooling setpoint should rise by the designed setback amount. Where setpoint reset is specified, confirm the supply or zone setpoint shifts correctly with load or outdoor conditions.
Deadband and PI Loop Tuning to Stop Hunting
A commissioning engineer named Priya recently took over a Singapore office tower where 30 fan coil valves “chattered” every morning at startup. The hardware was fine. The proportional-integral loop was tuned too aggressively, so each valve overcorrected, then reversed, then overcorrected again. Widening the deadband and slowing the integral action stopped the hunting within a day, and the actuators stopped wearing themselves out.
Tune the PI loop so the valve approaches setpoint without oscillation. Set the deadband between heating and cooling, typically 1 to 2 °C, so the two valves never fight each other.
2-Pipe Changeover and 4-Pipe Coordination
On a 2-pipe system, prove the changeover logic: when the central plant switches from chilled to hot water, the controller must recognize the new mode before opening the valve. On a 4-pipe system, prove the interlock that prevents the heating and cooling valves from opening together, except during intentional dehumidification with reheat.
Need controllers that handle changeover and deadband logic out of the box? See Black Ant’s room temperature controllers for 2-pipe and 4-pipe fan coils →
Phase 6: Air- and Water-Side Performance (TAB)
With controls proven, measure actual performance against design. This is the testing, adjusting, and balancing step that confirms capacity and efficiency.
Measuring Chilled and Hot Water Flow and ΔT
With the fan at medium speed and the control valve commanded fully open, measure the chilled or hot water flow rate and compare it to the design value within the allowed tolerance. Record the inlet and outlet water temperatures and calculate the temperature difference, or ΔT. A low ΔT at design flow often indicates a valve that is not opening fully, a dirty strainer, or a balancing error.
Verifying Airflow Against Design
Measure supply and return airflow and compare to design. Set the main duct first, then balance branches and outlets using the volume dampers. Airflow that is too low starves the coil; airflow that is too high wastes fan energy and can create noise complaints.
Estimating Coil Capacity on Site
Where a capacity check is required, estimate coil duty from the measured flow and ΔT:
kW = flow (L/s) × ΔT (°C) ÷ 0.239
This field calculation gives a practical sanity check against the technical submission. It will not replace a laboratory capacity test, but it catches gross errors before handover.
Phase 7: Safety Interfaces, Handover, and Sign-Off
The final phase proves the safety interfaces and produces the documented record that protects everyone involved.
Emergency Stop, Overload, and Fire-Alarm Interface
Prove the emergency stop trips the unit and sends an alarm to the BMS. Verify the overload protection shuts the unit down and reports correctly. Confirm the fire-alarm interface: on a fire signal, the fan coil unit should trip or switch to its defined fire mode, and the event should be logged at the BMS. Where an electric heater is fitted, prove the fan interlock and any post-purge run-on, typically around 15 minutes, so residual heat is cleared safely.
Final Setpoints and Time-Clock Settings
Return all setpoints and time-clock schedules to the design values after testing. It is surprisingly easy to leave a unit on a temporary test setpoint that wastes energy for months before anyone notices.
Compiling the Commissioning Report and O&M Handover
Record every reading on the commissioning and performance check sheets. Compile the handover package: material submittals, the BMS points list, marked-up schematics, fan curves, datasheets, register maps, calibration certificates, and the addressing log. Close punch-list items and obtain formal sign-off. The functional testing framework used here is consistent with the approach in the NIST HVAC functional inspection and testing guide and the broader commissioning process described by ASHRAE.
Common Fan Coil Commissioning Faults and How to Diagnose Them

Most commissioning failures fall into a short list of repeatable faults. Knowing the symptom points you straight to the cause.
| Symptom | Likely cause | Corrective action |
|---|---|---|
| Valve hunts or chatters | PI loop too aggressive; oversized valve; low valve authority | Widen deadband, slow integral, confirm valve sizing and authority |
| BMS point reads wrong value | Misaddressed node or wrong register/object mapping | Re-check address, register map, and object binding |
| Room overheats or overcools | Sensor out of calibration or badly located | Calibrate sensor; relocate away from drafts and dead pockets |
| No cooling in cooling mode | Swapped flow and return; changeover not recognized | Correct piping; verify changeover sensor and mode logic |
| Valve will not move | Signal mismatch (0 to 10 V vs 3-point); no power; stuck actuator | Match signal type; check supply voltage; free or replace actuator |
| Condensate leak at unit | Pan not level; trap dry; poor drain fall | Re-level pan; fill trap; correct drain fall to 1 to 3 percent |
| “Ghost” BMS alarms | Points enabled but not wired; alarm thresholds wrong | Disable unused points; set thresholds to design values |
| Water hammer on valve close | Actuator closes too fast; high system pressure | Slow actuator travel; check pressure and add control if needed |
Hunting, Misaddressed Nodes, and Swapped Connections
Three faults deserve emphasis because they account for a large share of callbacks. Hunting is almost always a tuning or sizing problem, not a defective valve. Misaddressed nodes are a documentation problem as much as a technical one, which is why the addressing log in Phase 3 matters. Swapped flow and return connections look like a control failure but are actually a piping error; the valve opens correctly yet the coil never delivers capacity because water flows the wrong way.
How Black Ant Hardware Shortens Fan Coil Commissioning
The fastest way to reduce commissioning time is to start with hardware that is designed to be commissioned. A contracting team on a recent Riyadh mixed-use project cut their per-unit commissioning time by roughly half by specifying pre-addressed controllers and pressure-independent valves; the balancing step that used to consume a full day per riser largely disappeared.
DN15/DN20/DN25 Fan Coil Control Valves with 2 to 5 Second Response
Black Ant fan coil control valves cover the DN15, DN20, and DN25 sizes used in most commercial fan coil units, in 2-way and 3-way configurations with normally open or normally closed fail-safe options. The precision actuators respond to thermostat commands within 2 to 5 seconds and hold zone temperature within ±0.5 °C, which makes the valve stroke and tight shut-off checks in Phase 2 straightforward to pass.
Pre-Addressed Controllers and Documented Register Maps
Native RS485, BACnet MS/TP, and Modbus RTU support lets each valve and controller integrate directly into most BMS platforms without a protocol gateway. Black Ant supplies the Modbus register map and BACnet object list with the product documentation, so the Phase 4 point-to-point test becomes verification rather than discovery. For OEM and large-project partners, controllers can be pre-addressed and pre-configured before shipment, which removes the most error-prone site step.
Room Temperature Controllers with Changeover Logic
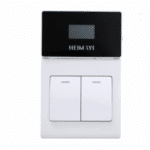
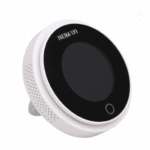
Black Ant room temperature controllers support both 2-pipe and 4-pipe sequences, with changeover input handling for 2-pipe systems and independent heating and cooling valve control with adjustable deadband for 4-pipe systems. Flush-mount formats suit commercial and residential installations, and wireless options support buildings without hardwired BMS infrastructure. To learn more about Room Temperature Controller for HVAC Fan Coil Systems, please click to refer to our accompanying guide.
Commissioning Support and Certified Manufacturing
For project supply, Black Ant’s application engineers provide integration notes for tested product combinations, for example a fan coil valve plus a room controller plus an IoT data collection terminal for buildings that feed a central dashboard. All fan coil valves and controllers are manufactured under ISO 9001 quality management and carry CE/RoHS compliance. Tying commissioned zones into a central building energy management system lets operators verify the 20 to 30 percent HVAC energy reduction that precise, well-commissioned control can deliver, and catch valves that drift or hunt long before occupants complain.
Frequently Asked Questions

How long does it take to commission a fan coil unit?
A single fan coil unit typically takes one to three hours to commission once mechanical and electrical installation is complete, covering pre-checks, valve stroke, controller addressing, BMS point-to-point, sequencing, and a basic performance check. Projects with manual balancing take longer; pressure-independent control valves and pre-addressed controllers can reduce balancing and commissioning time by 50 to 70 percent.
What is a BMS point-to-point test on a fan coil?
A point-to-point test verifies that every BMS point, including room temperature, setpoint, valve command, fan status, and alarms, is wired to the correct terminal, mapped to the correct register or object, and reporting the correct value. It is the step that confirms the BMS graphic matches what is physically happening at the unit.
Do pressure-independent control valves reduce commissioning time?
Yes. A pressure-independent control valve maintains its design flow regardless of system pressure changes, so the manual branch-by-branch balancing step is largely eliminated. Industry documentation commonly cites a 50 to 70 percent reduction in balancing and commissioning time compared with manually balanced systems.
What is the correct thermostat, valve, and fan sequence?
On a call for conditioning, the control valve opens first and the fan ramps up once water flows. On satisfaction, the fan ramps down or stops first and the valve closes afterward. This order prevents the fan from pushing unconditioned air across a dry coil and avoids drafts.
Who is responsible for fan coil commissioning?
Responsibility is shared. The mechanical contractor proves installation and water-side performance, the controls vendor or integrator proves controller addressing and BMS point-to-point, and the commissioning agent coordinates the procedure and signs off the functional test. Clear responsibility for each phase should be set in the commissioning plan before work begins.
Conclusion
Fan coil control system commissioning is what separates a fan coil unit that is merely installed from one that actually delivers the comfort, efficiency, and reliability the design promised. The seven phases, pre-commissioning checks, control valve and actuator test, controller addressing, BMS point-to-point, thermostat-valve-fan sequencing, performance measurement, and safety handover, turn assumptions into documented evidence. To learn more about Fan Coil Control Valve and Fan Coil Control Valve Wiring, please click to refer to our accompanying guide.
Key takeaways:
- Installation proves connection and power; commissioning proves the control system meets design intent
- The control valve deserves a dedicated functional test: signal type, full stroke, tight shut-off, and fail-safe position
- Controller addressing and BMS point-to-point verification catch the mapping errors that cause most ghost alarms
- Correct sequencing (valve opens before fan; fan stops before valve closes) protects comfort and saves energy
- Pressure-independent valves and pre-addressed controllers can cut commissioning time by 50 to 70 percent
- Documented register maps, calibration certificates, and an addressing log are what make handover defensible
The common thread is simple: a control system that is proven on site protects comfort, energy, and warranty for the life of the building.
Commissioning a fan coil project? Contact Black Ant’s application engineering team for valve sizing, pre-addressed controllers, documented Modbus and BACnet maps, and commissioning support, or explore our electric control valve range to complete your hydronic specification. To gain a deeper understanding of BACnet vs Modbus for HVAC Control Valves: An Integrator’s Guide, please click to refer to our accompanying guide.