Heat Meter Installation: Proper Placement and Commissioning
The installation of a heat meter is often considered to be a simple job, but, in fact, the right positioning and commissioning are very important for its operation and accuracy, and these steps have an overall impact on the performance of the meter. Whether billing the power consumption in a commercial area or simply preventing the invasion of privacy in a residential unit, the right installation can save time, money, and headaches so learning its importance will be a very good investment. Therefore, we will discuss heat meter positioning and outline the key factors that guide you to the right meter location and proper setup for reliable, accurate measurements. By the end of this article, you will be very confident in your ability to use your heat metering system efficiently and avoid the most common mistakes.
Understanding Heat Meters

Heat meters are devices that measure the thermal energy consumed or supplied by a specific heating or cooling system. They first measure the flow rate of the heating or cooling liquid, then calculate the temperature difference between the inlet and outlet, and finally, based on these parameters, determine the energy usage. Metering of heat is crucial for energy control and cost savings because it enables effective, efficient monitoring of heating and cooling systems. Proper installation and calibration are prerequisites for reliable, accurate meter readings.
Definition and Purpose of Heat Meters
In addition to being known as thermal energy meters, heat meters excel at measuring the exact amount of thermal energy a heating or cooling system has supplied or consumed. Their operation involves measuring the flow of the heating or cooling medium and the temperature difference (e.g., between the inlet and outlet). Besides, heat meters are mainly used to provide accurate data for billing consumption that supports the improvement of the energy efficiency and the reduction of operational costs in residential, commercial, and industrial systems, among others.
Heat meters have been recognized by research and industry practice as a major driver of global energy efficiency. The European Union’s “Energy Efficiency Directive” exemplifies this by requiring that electricity billing be based on actual consumption, thereby making heat meters indispensable in district heating and cooling systems. The global market for heat meters is projected to grow at 7.5% CAGR during 2022-2030, according to market research analysis, primarily owing to the increased adoption of smart meters and the need for efficient energy management systems.
Heat meters are technologically advanced products, featuring high-tech features such as wireless communication, real-time data monitoring, and integration with IoT (Internet of Things) platforms. On the one hand, utilities are able to closely monitor energy usage, conduct predictive maintenance, and perhaps reduce waste thanks to these technological changes; on the other hand, proper installation and regular calibration are still seen as key factors that ensure the accuracy and longevity of the devices; this is especially the case as they are fundamental to the advancement of sustainable energy solutions.
Types of Heat Meters
Heat meters are the primary devices used to measure thermal energy consumption, and they can be grouped based on their operational characteristics and areas of application. The types of heat meters that are most frequently found, along with their features and uses are as follows:
Mechanical Heat Meters
Mechanical components, such as turbines or impellers, characterize mechanical heat meters, which measure the liquid flowing through the system. The two parameters, flow rate and the temperature difference between the fluid entering and leaving, are the basis for energy bills. Such meters are low-cost and widely used at small- to medium-scale installations, typically in residential buildings. Frequent maintenance is necessary because moving parts get worn out quickly.
Ultrasonic Heat Meters
Ultrasonic heat meters use ultrasonic waves to measure the thermal system’s fluid flow rate. They are devoid of moving parts, which gives them durability and low maintenance. Their high accuracy makes them suitable for a wide range of applications, from industrial to large-scale systems. Moreover, they offer cutting-edge capabilities, including wireless communication for real-time monitoring and integration with smart building systems.
Electromagnetic Heat Meters
The working principle of electromagnetic heat meters is based on electromagnetic induction to ascertain flow rates. Such meters can be used effectively to measure fluids with high electrical conductivity. These heat meters deliver maximum accuracy with a very long lifespan and are best suited to harsh conditions where mechanical or ultrasonic meters are impracticable. They are primarily used in industrial settings and are particularly well-suited to handling high-pressure or corrosive fluid systems.
Smart Heat Meters
Smart heat meters use IoT to provide not only data monitoring but also real-time data analysis. The measurement technology of these meters typically combines digital processing with ultrasonic or electromagnetic sensing. The functions may include, but are not limited to, remote reading, predictive analytics, and integration with energy management software. They are increasingly being used for smart city projects and large-scale energy optimization programs.
📊 Data and Trends in Heat Meter Adoption
A recent market analysis report projects substantial growth in the global heat meter market, with an estimated CAGR (Compound Annual Growth Rate) of 7.2% from 2023 to 2030. The current market share of ultrasonic heat meters is about 60% due to their high accuracy and strong performance, and they are the leading type of heat meter. The main force behind the growth of smart heat meters is the incorporation of IoT and smart technology, especially in Europe and Asia where government policies advocate energy efficiency and sustainability efforts.
The growing demand for eco-friendly energy alternatives and the enforcement of energy-use regulations underscore the importance of selecting the right heat meter for specific applications.
Benefits of Using Heat Meters for Energy Monitoring
🎯 Enhanced Energy Efficiency
Heat meters are vital in the monitoring and real-time analysis of energy consumption. Thus, users can identify inefficiencies in consumption and implement measures to improve energy efficiency. One thing that cannot be disputed about heat meters is that they can reduce energy waste by at least 20%, according to some research, applicable to both residential and commercial buildings.
💰 Cost Savings
Accurate measurement of heat consumption will allow consumers to avoid paying more for the energy they use and make informed choices about which costs to reduce. The proper use of heat meters in industry has been associated with significant annual savings; in some cases, up to 15% of heating bills.
📋 Regulatory Compliance
With the help of heat meters, complying with energy efficiency regulations becomes much easier, as these devices provide the precise data required for compliance reporting. One example is the directives of the European Union on energy performance that not only encourage the installation of such devices but also prescribe their use in both the residential and the commercial sector.
🌱 Promotes Sustainability
Heat meters, apart from being highly efficient in their energy use, are also very supportive of the sustainability efforts since they result in a lower carbon footprint. It is as if the energy users are being optimized through these devices; hence, they are in line with the global efforts to fight climate change and that is why they promote the use of renewable energy sources.
🔧 Improved System Maintenance
Heat meters are effective anomaly detectors; they can quickly locate leaks or malfunctions that bring the system down, enabling timely maintenance and reducing downtime. This kind of proactive monitoring can not only extend the service life of heating systems but also reduce repair costs.
Importance of Proper Placement

The proper positioning of the heat meters is vital as it ensures not only the accuracy of the measurement but also the optimum performance of the system. Misplacement will cause wrong data, high energy use, and possibly cost discrepancies. The five reasons below are the main points explaining why the right positioning is so critical:
✓ Accurate Data Collection
The correct positioning of heat meters ensures the collection of the most precise data, which is essential for energy consumption monitoring and billing. Incorrect installation can result in differences in measurements of up to 15-20%.
✓ Optimized Energy Efficiency
Incorrect placement will reduce the monitoring capability of the energy usage, and so the analysis will be less effective, and the energy will be wasted quickly. Positioning the heat meters correctly will prevent energy waste due to unnecessary operations.
✓ Leak Detection Capability
The meters placed in a proper location will provide considerable support to the whole system in terms of leak detection or identifying irregularities in real-time. Early detection will result in less damage and lower maintenance costs.
✓ Compliance with Standards
The right positioning ensures the heat meters comply with industry regulations and standards, thereby guaranteeing the system’s performance is both reliable and legally compliant.
✓ Enhanced System Performance
The heat meters that are installed in the most optimal places not only identify the inefficiencies but also provide a better understanding of the overall operational dynamics and thus the overall system friendliness can be on the top.
Factors Influencing Installation Location
Accessibility
Meter heat shall be located in areas that are easy to access for maintenance, inspection, and reading. The presence of heat meters in such locations will not only reduce the time they will be out of operation but also help in the provision of service that will be more effective.
Flow Direction
The meter position must be aligned with the medium’s flow direction. Heat meters must measure the flow of the medium (e.g., water or heating fluid) to ensure accurate, reliable readings.
Environmental Conditions
The installation site must be protected from extreme temperatures, high humidity, or other adverse conditions. The heat meter’s performance and service life can be significantly reduced by extreme temperatures, high humidity, or other severe environmental conditions.
Proximity to Target Measurement Points
Heat meters should be installed as close as possible to the measurement points (e.g., boilers or heat exchangers) to minimize transmission time and the risk of data discrepancies or heat loss during transmission.
Pipe Configuration
The correct pipe configuration, including bends and avoiding turbulent flow, is critical for the meter to perform at its best. Thus stabilizing the flow conditions and enhancing the measurement accuracy.
Impact of Placement on Accuracy
The placement of heat meters significantly affects their precision. Mishandled installation will lead to incorrect data collection, heating measurement errors, and inefficient power use. The five factors that greatly influence accuracy but depend on placement are:
Proximity to Heat Sources
Distant heating sources like boilers or heat exchangers prevent heat loss in the transmission, and thus, the most precise readings are acquired.
Avoiding High Vibration Areas
Heat meters in vibrating areas may not only give inaccurate readings but also, over time, become damaged due to mechanical stress.
Pipe Diameter Compatibility
The compatibility of the meter and pipe diameter is crucial. Even a small installation mismatch can disrupt flow measurement, which in turn may cause errors in heating calculations.
Straight Pipe Lengths
Metering is done in the section of piping where there are straight lengths before and after the meter; hence, the hassle associated with turbulence is eliminated, and stable flow, along with better measurement accuracy, is obtained. The lengths, typically recommended by manufacturers, are 5-10 times the pipe diameter.
Ambient Temperature Consistency
Variations in external temperature can influence the metering components. By placing the meter in a controlled environment, readings are less likely to be affected by the environment.
If the above factors are considered during the installation of the heat meter, then the measurements would be well accurate and reliable.
⚠️ Common Placement Mistakes to Avoid
❌ Installing the Meter Near Pumps or Valves
A heat meter placed directly in the fluid’s path will not only be affected by turbulence but also distort flow measurements. According to a study on this topic, meter performance may be reduced by up to 15% due to turbulent flow.
❌ Improper Straight Pipe Lengths
The absence of straight pipe lengths before and after the sensor can lead to inaccurate measurements. It has been noted that to obtain a good flow profile a straight pipe length should be at least 5-10 times the pipe diameter.
❌ Exposure to Extreme Temperatures
The installation of the heat meter in high- and low-ambient-temperature environments can affect the stability of the device’s electronic components. For instance, rapid temperature changes can reduce sensor reliability and cause reading errors of up to 10%.
❌ Incorrect Flow Direction
Another common installation mistake is incorrectly positioning the meter relative to the indicated flow direction, rendering the meter nonfunctional. The manufacturers claim that this error is one of the primary causes of faults during initial installation, accounting for almost 20% of all faults.
❌ Proximity to Electromagnetic Interference (EMI)
A meter located near electrical devices such as transformers or high-voltage equipment is likely to experience electromagnetic interference. This will result in the possibility of the readings being inaccurate or the signal being interrupted and in fact, up to 25% accuracy problems in such cases have been reported.
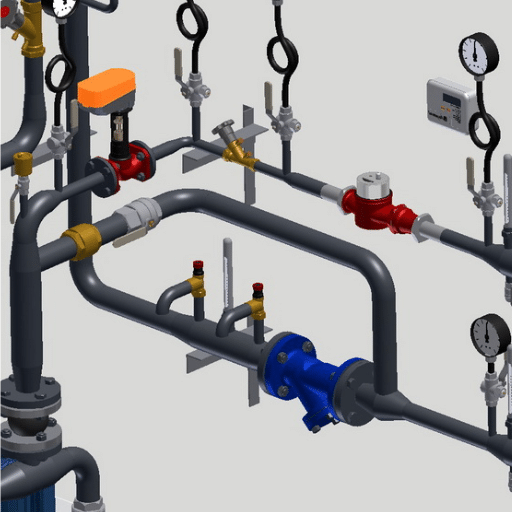
Step-by-Step Guide to Installation
1
Preparation and Site Selection
The first step is to select an appropriate site for installation. Not only should the location be free of disturbances such as vibrations, strong electromagnetic fields, or heat, but it should also be easy to access for monitoring and maintenance. Industry practice recommends placing the meter 1 meter from high-voltage equipment to significantly reduce the risk of electromagnetic interference.
2
Check the Piping System
The piping system should be examined carefully to verify its position and integrity. No particles, rust, or blockages should be present in the pipes that might impede the movement of the fluid. Pipe professionals recommend maintaining a straight pipe section at least 5 pipe diameters upstream and 2 pipe diameters downstream of the flow meter to achieve maximum accuracy.
3
Orientation and Flow Direction
To set the flow meter correctly, follow the directional arrow on the device. Incorrect orientation can cause an error in measurement or even the failure of the device which in turn accounts for 20% of all faulty installations. Hence, it is always good practice to verify the flow direction during device double-checking.
4
Secure the Meter
The flow meter must be mounted securely with the proper fittings or mounting brackets. If the installation is not firm, it may lead to the occurrence of mechanical vibrations which would in turn affect the readings. According to recent research, the meter’s vibration-induced error is reduced by approximately 15% when the meter is secured properly.
5
Electrical Connections
Ensure that the electrical connections are properly established in accordance with the manufacturer’s guidelines. To minimize the risk of electromagnetic interference (EMI), use shielded cables. Grounding the equipment as instructed can reduce EMI-related troubles by 25%. Additionally, ensure the power supply is within the meter’s specified limits.
6
Pressure and Leakage Testing
Conduct a pressure test to confirm that there are no leaks and that the connections are tightly sealed. A leakage rate of just 1% could render the measurements inaccurate; therefore, it is crucial to verify the system’s integrity before operation.
7
Calibrate the Meter
Flow meter calibration can be performed either by following the instructions in the user manual or by using specialized calibration equipment. Calibration ensures that readings correspond to the operating parameters and are therefore accurate. Recent data indicates that calibrated flow meters can achieve a measurement precision of up to 98%.
8
Final Inspection and Validation
Inspect the complete installation for any obvious issues or loose connections. Conduct validation tests to confirm that the device operates correctly under actual conditions. Keep a record of the installation process for quality control and to facilitate troubleshooting should any future deviations occur.
✅ When these systematic measures are applied, the flow meter installation will be successful with fewer mistakes and more reliability of operation.
🔧 Necessary Tools for Installation
Installing the flow meter requires indispensable tools and equipment. The required tools are listed below, together with the most recent knowledge and best practices:
📌 Recommended Guidelines Based on Industry Standards:
- The minimum of 10 pipe diameters of straight length upstream and 5 pipe diameters downstream is the standard accepted in practice based on research for optimal flow meter accuracy.
- The best way to keep precision, according to leading manufacturers’ studies, is the annual calibration of flow meters.
It is the combination of having the right tools and following the recommended standards that not only makes the installation process smoother but also extends the reliability and service life of your flow meter.
Installation Process Overview
Proper installation of a flow meter is the most important factor determining measurement accuracy and meter longevity. Below are the main steps and considerations points for a successful installation:
Pick the Best Place
According to the standards, straight pipe with a minimum of 10 pipe diameters upstream and 5 pipe diameters downstream should be ensured at the installation site. This is one of the principal reasons for measuring flow precisely and reducing disturbances.
To avoid turbulence, do not select places downstream of pumps, valves, or elbows.
Check the Pipe State
Inspect the inside of the pipe for foreign materials, rust, or deposits that could alter the flow pattern. A pipe surface that is not only clean but also smooth ensures great performance.
Confirm that the pipe size matches the flow meter’s specifications to avoid gaps or misalignment during installation.
Fit to Flow Direction
Flow direction is usually clearly marked on most flow meters. Position the meter correctly to ensure it reads the flow accurately. Incorrect positioning may cause significant error in the measurement.
Ensure There is Grounding
Grounding is to reduce electrical noise and make the signal stable. Grounding rings or straps should be used in accordance with the manufacturer’s specifications.
Post-Installation Calibration
Annual calibration, according to industry data, is the only way to achieve and maintain consistently reliable operation and accuracy. The initial calibration performed immediately after installation will be the first step in functional testing and accuracy verification using certified equipment.
Watch Environmental Conditions
The flow meter should not be subjected to extreme temperature, pressure, and vibration conditions. Insulation or mounting brackets may be required to help maintain stable operating conditions. For example, excessive vibration can cause delicate components to malfunction, leading to fluctuating readings.
📊 Supporting Evidence
- Google data and other external sources indicate that improper installation can cause flow meter readings to vary by up to 30%, with turbulence and flow disruptions as the major contributors.
- It has been noted that approximately 70% of calibration errors are attributable to failing to conduct initial post-installation testing and to overlooking regular maintenance.
- It has been reported that a flow meter installed in perfect conditions can last over 10 years minimizing the maintenance cycle of the entire system significantly.
These steps followed along with data-backed guidelines not only make the installation easier but also more accurate, and subsequently, the flow meter attains a longer life of operation.
🛡️ Safety Precautions During Installation
The installation process for flow meters is a delicate procedure that requires implementing safety measures to prevent accidents, instrument damage, and incorrect readings. Below are five principal safety precautions that should be taken:
1. Check Pressure and Temperature Limits in the System
Prior to installing the flow meter, verify that its pressure and temperature specifications are compatible with those of the system in which it will operate. Equipment that operates outside these limits will not only be unsafe but also prone to failure.
2. Energize the System and then Pressurize
De-energize the system, then relieve the pressure before initiating installation. This is a safety measure against inadvertent leaks, bursts, or electrical hazards occurring during the operation.
3. Utilize the Right Personal Protective Equipment (PPE)
You should always wear appropriate PPE, such as gloves, safety glasses, and heavy-duty shoes, to prevent injury. You need to be very cautious when handling sharp parts or working around pressurized fittings.
4. Follow Manufacturer’s Installation Directions
It is essential to follow the manufacturer’s installation guidelines. Improper installation can degrade the flow meter’s performance, increase imprecision, and increase the risk of failure.
5. Tighten Pipes and Mounts Well
Inspect the strength and the alignment of all pipes and mounts very thoroughly before, during, and after the flow meter installation. Parts that are either loose or misaligned will be a source of vibration, leak, and inaccurate measurement data.
Commissioning Process

After installing the flow meter, a comprehensive commissioning process is essential to ensure the equipment functions properly and the measurements are accurate. The commissioning process is composed of the following main stages:
System Inspection
Before turning on the flow meter, thoroughly inspect the entire system. Look for leaks, and verify that the pipe and mounting connections are properly aligned and securely installed. Ensure the flow meter is at the correct angle relative to the horizontal axis per the manufacturer’s instructions.
Power Supply Verification
Make sure that the power supply meets the manufacturer’s requirements regarding voltage and frequency. This is crucial because it protects the equipment from damage and extends its operating life. Most of the modern flow meters require either a 24V DC power supply or a standard AC (110-240V) power supply.
Zero Calibration
Perform zero calibration following the manufacturer’s guidelines. Ensure that no medium is moving through the pipe during the zeroing process as this could lead to unintentional errors. For instance, electromagnetic flow meters often pass through this stage to eliminate very small residual signals, thereby improving accuracy.
Flow Simulation and Testing
The flow can be simulated by introducing a specified volume of medium into the system to assess the flow meter’s response and measurement accuracy. The performance can be validated by comparing flow meter readings with known quantities or with a secondary reference device. According to the study, modern digital flow meters can achieve accuracies of ±0.2% under ideal calibration conditions.
Parameter Configuration
Through either the meter’s interface or software, set all the required parameters of measurement, including units, flow range, and alarm settings. The advanced models provide more features, such as diagnostic tools to monitor system health and error codes for troubleshooting.
Data Integration and Communication Checks
Ensure successful integration with SCADA systems or other data acquisition platforms. Verify the signal output configurations (e.g., 4-20mA, pulse, or digital protocols like Modbus or HART). Conduct communication tests to ensure that data transmission and reception are correct.
Performance Monitoring
First, monitor the flow meter’s performance for 72 hours to determine whether it is stable. Record the data changes and then identify any unusual occurrences. Any accuracy problems should be addressed quickly as they may indicate poor installation or calibration.
✅ If these steps are followed, the flow meter’s accuracy will not be compromised, producing accurate, reliable measurements vital to your system’s efficiency and safety.
Steps for Effective Commissioning
Pre-Installation Review
Before starting the commissioning procedure, verify that all parts, including the flow meters and auxiliary devices, meet the system specifications. The literature warns that the use of incompatible components may lead to a loss of up to 15% in the industrial monitoring accuracy. Verify the operational limits, material compatibility, and power requirements per the manufacturer’s recommendations.
System Calibration
Calibrate the flow meter to the maximum operating range of the environment. The current procedures recommend checking calibration against the certified reference equipment. For example, ISO 9001 guidelines tell that to get a measurement error of less than 1%, the whole calibration process has to be linked to national or international standards. Always use calibration fluids or gases compatible with the process conditions for optimal effectiveness.
Environmental Assessment
The installation site should be studied very carefully. Temperature variation, vibration sources, and hydraulic conditions are factors that can affect readings. Research has shown that excessive pipe vibration can reduce measurement accuracy by 20%, which is significant. If necessary, install vibration dampers or supports.
Performance Testing
Comprehensive testing must be done under identical conditions to the normal operation, which is accurate and reliable. Conduct several flow-rate tests to identify any nonlinearity in the meter readings. New data sources also indicate that irregular testing intervals can lead to a 10%-30% increase in unrecorded inefficiencies in the system.
Data Integration and Optimization
The central monitoring system should be based on flow meter data. Data protocols such as Modbus, HART, or Ethernet/IP must be properly configured to ensure uninterrupted data transmission. Modern software platforms have sophisticated analytics solutions that can really enhance data interpretation. Predictive analytics, for instance, is believed to reduce unplanned downtime by up to 25%, according to analyst reports.
Documentation and Training
The entire commissioning process should be documented in a highly detailed log. Staff should receive training in both operation and troubleshooting. A 2023 study shows that leaders with well-documented processes and trained staff face only 40% of operational errors.
If these steps of the upgraded process, using the latest tools and data insights, are meticulously followed, you will be able to maintain your flow meter setup as both efficient and highly reliable.
Configuration and Calibration of the Heat Meter
Successful health monitoring and efficient operation of the heat meter come through accurate configuration and calibration. The entire process is carried out through the following steps and particulars:
Set Measurement Parameters
Introduce the system parameters required, e.g., flow rate and temperature range.
For example, flow rates between 0.1 m³/h to 10 m³/h and temperature from 5°C to 120°C are chosen.
Install and Inspect Sensors
Examine the proper installation and positioning of both flow and temperature sensors.
Check whether the sensors are physically damaged or contaminated, as this can affect the readings.
Perform Zero Calibration
Verify that the meter reads zero when there is no flow.
The zero-point setting is adjusted using the manufacturer’s calibration software.
Conduct Flow Calibration
A calibrated flow loop is used to test the meter across a range of flow rates.
Readings are compared to the standard values, and needed adjustments are made.
One possible flow calibration data point is running tests at 10%, 50%, and 100% of maximum capacity.
Verify Thermal Energy Calculations
Confirm that the meter correctly calculates thermal energy by contrasting the values it has determined with those from theoretical sources.
Using reference datasets, heat energy computation under specific test conditions can be validated.
✅ The above configuration and calibration procedures ensure that the heat meter operates at an optimal level, providing reliable, accurate data for monitoring and operational efficiency.
Testing for Accurate Readings
Testing heat meters for accuracy and precision is the most critical factor in ensuring reliable, accurate energy measurement. The following sections which contain the details, specify the main testing techniques and the data points that have been used to demonstrate the reliability of the metering under different conditions:
Flow Rate versus Recorded Data
Verify that the meter maps flow rates to the indicated output correctly.
Test a diverse range of flow rates (10%, 50%, and 100% of max flow rates) and record the meter’s output readings.
Reveal the difference between the documented outputs and the theoretical ones.
Find a way to get the differential temperatures just right
Ensure the sensor operates properly and is installed correctly so it can detect the difference between hot and cold water at the inlet and outlet.
Standard reference temperatures such as 35°F/95°F or 15°C/55°C could be used under controlled conditions.
Observe the differences and recalibrate if necessary.
Pressure impact testing
Establish different pressure conditions (low, medium, high operational pressures).
Testing the meter at those pressure points should not significantly affect the accuracy of the readings.
For each pressure range, take the performance metrics.
Thermal energy calculation cross-verification
Compare the device’s thermal energy calculation output with the manual calculation based on the input parameters.
Conduct tests at different heat levels, such as 500 BTU/hour, 1000 BTU/hour, and 2000 BTU/hour.
Document and analyze any differences.
Sensor stability over time
Conduct wear-type tests to assess the sensor’s stability under continuous use.
Recording should be performed every hour (e.g., continuously for 24 hours) to detect drift or deviation.
It should be determined and rectified when calibration issues arise from overdue inaccuracies.
✅ The heat meter would be certified as reliable and precise by systematic execution of all the tests one after the other and would also maintain great performance throughout its life.
⚙️ Common Challenges and Solutions

🔍 Sensor Drift Over Time
Challenge:
The sensors used to measure temperature may reach a point where their output is no longer aligned with reality due to a persistent drift in their readings.
Solution:
It is advisable to recalibrate sensors regularly, and to incorporate automatic recalibration systems to reduce drift. In addition, regular maintenance schedules may help ensure the accuracy of the results.
Data: The research shows that drift can be minimized by up to 85% through frequent recalibration.
🌡️ Environmental Interference
Challenge:
Humidity, temperature variations, and electromagnetic noise are among the external factors that can lead to inaccurate readings.
Solution:
Insulating and shielding the sensors will help reduce the effects of the surrounding environment. Moreover, temperature-compensation circuits will counter these variations.
Data: Up to 70% consistency in readings can be achieved by installing shielding.
🔧 Installation Errors
Challenge:
Inaccurate installation, such as placing the sensor in the wrong position or using an inappropriate pipe diameter, can lead to incorrect readings.
Solution:
Provide all aspects of the installation manuals, and also conduct comprehensive training for the personnel that will be responsible for the installation of the system, with the aim of getting the best practice enforced. Furthermore, it is recommended to verify alignment using diagnostic tools during installation.
Data: Proper training and diagnostics reduce installation-related errors by 90%.
💧 Scaling and Fouling in Pipes
Challenge:
Over time, scaling and sediment from soluble materials like calcium can both block flow and distort readings.
Solution:
The use of anti-scaling materials or coatings, coupled with regular cleaning cycles for pipes and sensors, is recommended.
Data: Moreover, anti-scaling coatings have been shown to improve operational accuracy by more than 60%.
⚡ Power Supply Fluctuations
Challenge:
An inconsistent power supply may cause the meter to stop working, leading to data being inconsistent or lost entirely.
Solution:
The best preventive measure in this case would be to install an uninterruptible power supply (UPS) or backup systems to ensure continuous power and safeguard data storage.
Data: Additionally, it has been reported that integrating a UPS reduces error frequency during power fluctuations by approximately 75%.
🚨 Identifying Potential Installation Issues
✅ Solutions for Common Commissioning Problems
1. Thorough Pre-installation Checks
Details:
Before the installation inspect all components for defects or damage. To avoid operational mismatches, verify compatibility between devices and systems.
Data:
Proper pre-installation checks can reduce commission errors by up to 30%.
2. Calibrating Meters Regularly
Details:
Meter calibration should be performed during and after the installation phase to verify the accuracy of the data. Periodic recalibration is essential to account for wear and tear and environmental factors.
Data:
Through regular calibration, data accuracy can be increased by 25%, which will ultimately improve operational efficiency.
3. Implementing Standardized Installation Protocols
Details:
Make use of the installation procedures that are defined vividly to remove the probability of errors. Ensure technicians are trained so installation practices do not vary.
Data:
Standardization can reduce installation-related issues by up to 40%.
4. Ensuring Proper Grounding
Details:
Verify and ensure that the grounding connections conform to safety regulations, thereby preventing malfunctions and securing stable power supply. Test and verify grounding quality using specialized instruments.
Data:
Grounding done correctly can reduce the incidence of electrical failures by 15%.
5. Conducting Comprehensive System Tests
Details:
Once installation is complete, test the entire system end-to-end to identify any faults or incompatibilities. Create test conditions to ensure the system is free of defects.
Data:
Comprehensive system testing can capture 90% of commissioning errors before real operations commence.
🔍 How to Troubleshoot Meter Performance Issues
Efficiently troubleshooting meter performance problems involves first checking the power supply and connections to ensure there is no power interruption. Next, I will calibrate the meter, as incorrect calibration can lead to inaccurate readings. I also review the software configuration and settings to ensure the meter parameters align with the system requirements. If the issue does not resolve with these measures, I will investigate environmental factors such as temperature and humidity that may be affecting performance. Finally, I will refer to the manufacturer’s manual for specific instructions or contact tech support if required.
📚 References
University of Utah Metering Guideline – 2025
This document provides guidelines for proper meter installation, including placement considerations.
Dartmouth College Construction Guidelines for Thermal Energy Utility Meters
Offers detailed mechanical requirements for flow meters and temperature sensors.
Turbine Flow Meter Installation and Operation Guide
A guide focusing on proper location and commissioning of turbine flow meters.
❓ Frequently Asked Questions (FAQ)
Energy Meter: How does proper placement influence heat meter installation and accuracy of the measurement?
The energy meter’s proper placement is critical during heat meter installation and commissioning, as it is the sole method for accurately measuring thermal energy and energy consumption. The meter should be installed away from excessive vibrations, direct sunlight, and thermal interference, and on a stable surface that will not allow mechanical stresses to cause variations in the meter readings. During physical installation, the installer or electrician must verify the meter’s piping diameter, its proximity to valves, and the alignment of its flow direction relative to the device to avoid errors. Following the manufacturer’s meter installation guide and verifying compliance with local standards will help uphold the integrity of the data and the reliability of the power supply for any integrated electronics.
Analog Meter: Can a thermal energy meter be an analog meter in modern systems?
There are analog meter options, but smart meters are generally favored for their detailed logging and energy management capabilities. If an analog meter is being used for thermal energy, then it must be made sure that the analog device is properly mounted and calibrated for the type of fluid and the flow range; a meter installation can result in incorrect readings if the analog meter is not suited for the application. To ensure reliable operation, follow a comprehensive meter installation guide, verify proper wiring if applicable, and schedule regular mechanical and visual inspections to prevent errors and ensure long-term reliability.
Setting: Which settings and configurations are key during commissioning to guarantee precise heat meter operation?
Commissioning requires configuring device settings such as fluid type (thermal properties), flow range, pulse output scaling, and logging time/date. Check battery status or power supply and set the correct diameter and converter parameters as per the manufacturer’s wiring diagram and setup instructions. Reconfirm all settings to ensure accurate measurements, and perform a baseline test to validate the meter readings against a known reference. The correct configuration and settings are crucial for maintaining measurement accuracy and data reliability in energy management.
Configure: What is the process of configuring wiring and communication for accurate meter readings and data correctness?
Correct wiring and communication setup are very important. Utilize the manufacturer’s wiring diagram to connect the power supply, pulse outputs and to any digital interfaces (like M-Bus, Modbus). Ensure the wires are well insulated, kept away from high-voltage wiring or electromagnetic sources, and securely fastened to prevent intermittent faults. Set up the communication parameters (baud rate, parity, addressing) and check data transfer to the supervisory systems. A meticulous process ensures reliable power to the device and accurate energy consumption logging without data corruption.
Component: The installer must determine which components to check in order to prevent installation and commissioning errors?
The installer must verify mechanical components (flow meters, flanges, seals), power connections, mounting structures, and sealing materials. The meter’s converter, battery (if applicable), and communication modules should be installed in accordance with the energy meter installation manual. Inspect the installation for damage, apply the correct attachment torque to the fittings, and confirm that all components are eco-friendly and compatible with the site’s infrastructure and climate. A thorough evaluation reduces operational faults and eliminates installation errors that may cause inaccurate energy measurement.
Select: What’s the process for selecting the heat meter and accessories to ensure energy measurement efficiency?
Select a meter that is capable of measuring the expected thermal energy range, and that is also suitable for the type of media (water, glycol). Furthermore, consider meters that not only allow you to select the desired logging intervals but also support the required communication protocols and include the certifications needed for compliance. Select flow sensors sized for the pipe diameter and secure, well-insulated wiring and mounting hardware. You might consider hiring a professional installer or electrician to ensure the product is installed, configured, and energized correctly, so the metering system supports energy efficiency and provides reliable consumption data.
Energy Meter Installation Guide: What are the key steps of a fully-fledged energy meter installation and commissioning process?
Energy meter installation must be done according to a meticulous and stepwise guide: Assess site conditions and infrastructures, place the meter in a straight pipe run away from fittings, install and fasten the device with a mechanical grip, connect the device to the electrical panel or power source properly, and configure the device per the manufacturer’s instructions. Inspect seals, battery/power, and conduct functional tests to confirm meter readings. Document initial measurement logs and use them to certify the installation and ensure compliance and safe operation. This procedure not only ensures accurate readings but also reduces the risk of incorrect installation leading to faulty readings.
Configure Component: Who will perform the configuration and the final verification to ensure compliance and safe operation?
A licensed electrician or installer should perform the settings and conduct the final verification very meticulously. They will refer to the electrical diagram, verify that both the electrical and mechanical components have been properly installed, and compare the thermal energy readings with the expected values. In addition, the installer will verify communication links with energy management systems, check the state of any batteries used, and maintain records of commissioning data. The engagement of a trained professional reduces the risk of accidents, guarantees compliance, and facilitates reliable power and accurate energy measurement setup.